

Understanding DIY Home Energy Storage
If you’re worried about power outages, rising electricity bills, or your solar panels wasting energy when the grid is down, a DIY home energy storage system can change that.
What Is Home Energy Storage?
In simple terms, home energy storage means:
- You store electricity in a home battery bank
- You use that stored power later for backup, bill savings, or energy independence
Think of it as a rechargeable home power bank:
- It charges from solar panels, the grid, or a generator
- It discharges to run your lights, fridge, Wi‑Fi, and critical loads when you need it
This is the core idea behind a diy home battery storage setup or a residential battery backup system.
How DIY Home Batteries Work With Solar and the Grid
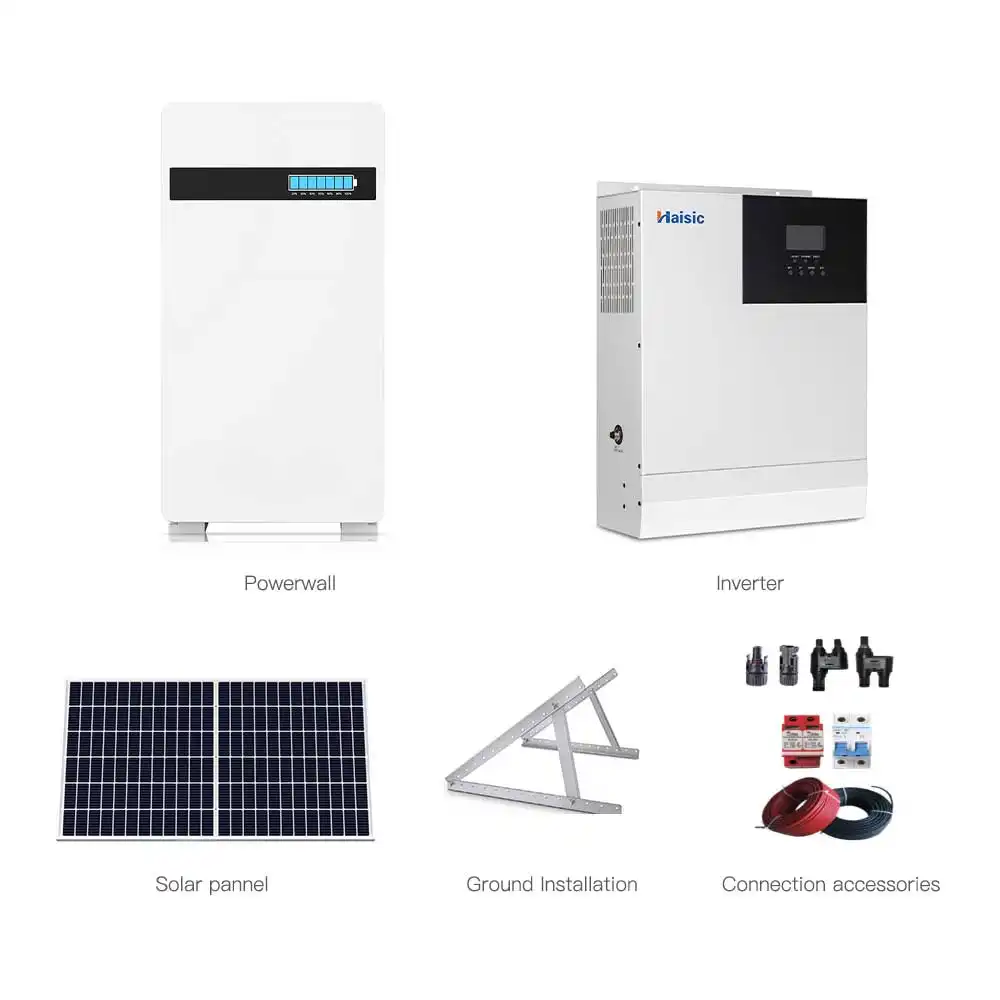
A typical diy home energy storage system ties together:
- Solar panels → Make DC power during the day
- Hybrid inverter for home solar → Converts DC ↔ AC and manages solar, grid, and battery
- Home solar battery bank (often LiFePO4 home energy storage) → Stores extra energy
- Grid connection (optional) → Provides backup and lets you buy/sell power
Basic flow:
- Sunny daytime
- Solar powers your home first
- Extra power charges your home battery storage system
- Night or outage
- The inverter pulls from your diy home battery backup
- Keeps essential circuits running even if the grid is down
This is how grid tied solar battery storage and off grid home battery systems work at a high level.
Why People Build DIY Systems
Most DIYers I work with want one or more of these:
-
Backup power during outages
- Keep fridge, lights, internet, and furnace fan running
- Act as a whole house battery backup or at least essential loads backup
-
Lower power bills
- Charge batteries when rates are low
- Use stored power during time of use (TOU) peak pricing
- Reduce grid usage with solar battery storage for home
-
More independence and control
- Rely less on an unstable grid
- Understand exactly how your diy solar and battery setup works
- Scale up over time instead of buying a fixed, closed system
-
Cost vs branded systems
- DIY can be cheaper than a Tesla Powerwall style install
- You choose your own lithium iron phosphate home battery, inverter, and monitoring
Myths, Real Risks, and What’s Actually Safe
There’s a lot of noise around diy powerwall projects. Here’s the honest split:
Common myths:
- “All lithium batteries are fire bombs.”
- “DIY always voids insurance and is illegal.”
- “Lead‑acid is always safer than lithium.”
Actual risk points:
- Poor wiring: undersized cables, no fuses, bad connections → overheating & fire risk
- No Battery Management System (BMS): overcharge/over‑discharge → cell damage or failure
- Unapproved AC work: unsafe backfeed to the grid → shock hazard for you and utility workers
- Improvised enclosures: no ventilation, no clearances, no protection from damage
Safer practices:
- Use LiFePO4 batteries (lithium iron phosphate) designed for home energy storage
- Always run a quality battery management system for LiFePO4
- Protect all circuits with correct fuses, breakers, and disconnects
- Keep batteries in a cool, dry, non-living space with good ventilation
- Hire an electrician for panel, transfer switch, and grid‑tie work
Done right, a diy home energy storage system can be safe, reliable, and cost‑effective—but only if you respect the limits of what should and should not be DIY.
Figuring Out Your Power Needs for DIY Home Energy Storage
Before you buy a single battery, you need to know how much power you really use and what you actually want to back up. This is what separates a smart DIY home energy storage setup from an expensive guess.
Read Your Power Bill and Daily kWh
- Look for “kWh used” or “energy usage” on your bill.
- Note:
- Monthly kWh (total)
- Billing days (usually 28–31 days)
- Formula:
Daily kWh = Monthly kWh ÷ Billing days
Example: 900 kWh / 30 days ≈ 30 kWh/day
That daily number is your baseline for sizing a home solar battery bank and deciding if you’re aiming for partial or whole‑home backup.
Essential Loads vs Whole‑Home Backup
Decide what matters most during an outage or peak pricing:
-
Essential loads (recommended for most people):
- Fridge/freezer
- Wi‑Fi & networking
- A few lights & outlets
- Phone/laptop charging
- Gas furnace blower or small AC/heat pump (if climate demands it)
-
Whole‑home backup:
- Runs everything: ovens, large AC, EV charger, electric water heater, etc.
- Needs a much larger battery bank and inverter, similar to a 5kW–10kW home solar storage system.
For a first DIY home battery backup, I strongly suggest starting with essential loads only. You get reliability and lower cost, and you can always scale.
List and Measure Your Critical Appliances
Make a simple table for your backup list:
| Appliance | Watts (W) | Hours/Day | Wh/Day |
|---|---|---|---|
| Fridge | 150 | 8 | 1200 |
| Wi‑Fi + router | 20 | 24 | 480 |
| LED lights (6x10W) | 60 | 5 | 300 |
How to get the numbers:
- Check nameplates/labels (Watts or Amps × Volts).
- Use a plug‑in power meter (Kill‑A‑Watt style) on 120V loads.
- For hard‑wired loads (furnace, well pump), check spec sheets or ask an electrician.
Add the Wh/Day for all critical loads, then divide by 1000 to get kWh/day for essentials.
Use Simple Tools and Calculators to Size Your Battery Bank
Once you know your essential kWh/day, you can estimate battery size:
- Example: Essentials = 5 kWh/day
- Want 1 day of backup → 5 kWh battery
- Want 2 days → 10 kWh battery
For LiFePO4 home energy storage, you can safely use around 80–90% of rated capacity:
- Need 5 kWh usable → choose around 6 kWh nominal capacity
- Need 10 kWh usable → around 12 kWh nominal
You can use any basic online battery bank calculator (search “home battery bank size calculator”) and plug in:
- Daily kWh needed
- Days of backup
- Battery type (LiFePO4 vs lead‑acid)
- System voltage (12V / 24V / 48V)
If you want a ready‑to‑go benchmark, a 10 kWh off‑grid solar power kit like this 10kW off‑grid solar power system shows the scale needed for heavy or whole‑home users.
How Climate, Roof, and Grid Reliability Change Your Design
Your location changes everything:
-
Climate:
- Very hot or very cold? You’ll use more for heating/cooling, and your lithium batteries hate extreme cold/heat.
- You may need battery heating or cooling and a larger bank for long winter nights.
-
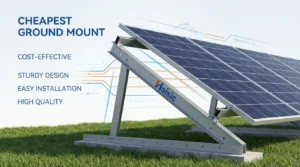
Roof and solar potential:
- Limited roof space or shading → less solar → lean more on grid‑charging plus storage.
- Big sunny roof → you can pair a solid hybrid inverter for home solar with more panels to recharge your DIY home battery storage faster.
-
Grid reliability:
- Frequent, long outages → design for more days of autonomy (bigger battery, maybe generator support).
- Stable grid, high time‑of‑use prices → optimize for bill savings (charge off‑peak, discharge on‑peak) rather than max backup hours.
Once you know your daily kWh, your essential loads, and your local conditions, you’re ready to size a realistic, safe, and cost‑effective diy home energy storage system instead of guessing.
Main Types of DIY Home Energy Storage
1. Battery‑Based DIY Home Energy Storage
For most people, battery-based home storage is the only option that truly makes sense at a DIY level.
The main styles you’ll see:
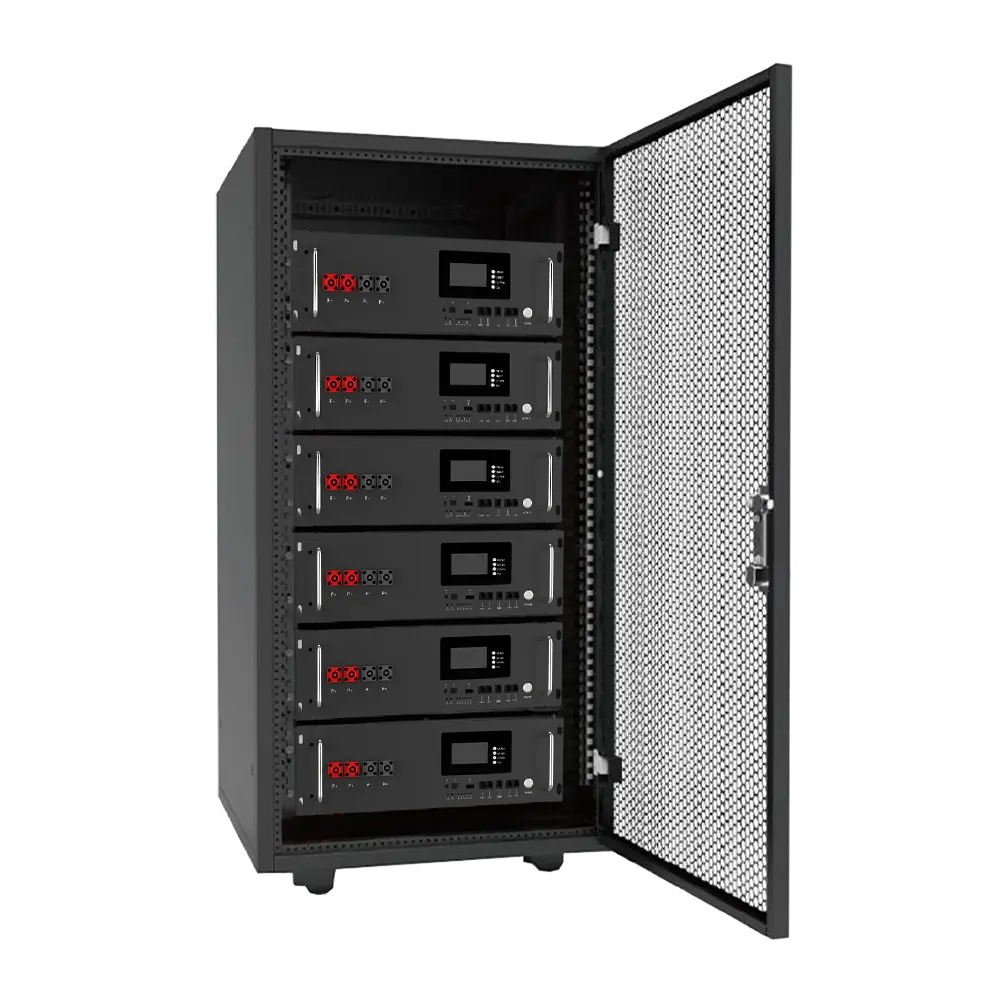
- Modular server‑rack batteries
Ready‑made LiFePO4 rack units (for example, a 25.6V 200–305Ah home energy storage battery with touchscreen control like these rack systems) are the most plug‑and‑play way to build a home solar battery bank. - DIY Powerwall‑style builds
Custom packs built from prismatic LiFePO4 cells or repurposed EV cells. Higher risk, more work, but very flexible for a diy home battery storage project. - Portable home backup batteries
Suitcase or wheeled battery stations that can run fridges, routers, some lights. Great for renters or small diy home battery backup setups.
For most residential users who want reliability and safety, I lean toward LiFePO4 server‑rack systems over raw cell builds.
2. Off‑Grid vs Grid‑Tied Battery Systems
When you plan a diy solar and battery setup, you usually decide between:
-
Off‑grid home battery system
- Your batteries + solar = your main power.
- Best for cabins, rural homes, or places with terrible grid reliability.
- Needs more storage and a beefier inverter to ride through bad weather.
-
Grid‑tied solar battery storage
- Your home energy storage system works with the grid.
- Batteries cover outages and/or shift power to avoid high time‑of‑use rates.
- Needs a hybrid inverter for home solar that can talk to grid, solar, and battery.
Many “normal homes” go grid‑tied first, then add more storage later if they want near whole house battery backup.
3. Why Gravity, Sand, and Thermal DIY Storage Don’t Work Well at Home
You’ll see a lot of hype around gravity energy storage diy home ideas, sand batteries, or thermal energy storage home diy concepts. They’re interesting, but in real homes they usually fail on:
- Energy density – You need huge mass or volume for useful storage.
- Complexity – Moving weights, handling hot sand, or capturing heat safely at scale is not a simple weekend project.
- Control & efficiency – It’s hard to get predictable, efficient, day‑to‑day performance versus batteries.
These approaches make more sense at utility or industrial scale, not in a suburban garage.
4. When Non‑Battery Options Still Make Sense
Non‑battery options can still play a supporting role:
- Propane / gas generators for long outages, paired with a smaller residential battery backup.
- Thermal storage like extra hot‑water capacity or well‑insulated tanks to trim heating costs.
- Smart load shifting (running washers, dryers, EV charging at off‑peak times) to reduce how big your home battery storage system needs to be.
But if you want clean, flexible, safe diy home energy storage for real‑world use, LiFePO4 home energy storage batteries are still the core solution.
Best Battery Options for DIY Home Energy Storage
When I build or spec a DIY home energy storage system, I treat the battery choice as the single most important decision. It decides safety, lifespan, and total cost.
LiFePO4 vs Other Lithium Batteries
For diy home battery storage, LiFePO4 (lithium iron phosphate) is the clear winner for most homes:
LiFePO4 (LFP):
- Very stable, low fire risk
- 4,000–6,000+ cycles at 80% depth of discharge
- Works great for daily solar battery storage for home
- Slightly heavier, but that doesn’t matter in a fixed home system
Other lithium chemistries (NMC, NCA, etc.):
- Higher energy density (great for EVs, not needed at home)
- Higher fire risk and stricter protection needed
- Typically fewer cycles for the same cost in residential use
For long‑term residential battery backup, I stick with LiFePO4 home energy storage almost every time.
LiFePO4 vs Lead‑Acid for Home Storage
Lead‑acid (AGM, GEL, flooded) still shows up in diy off grid power systems, but it’s usually a false economy.
| Feature | LiFePO4 | Lead‑acid (AGM/Flooded) |
|---|---|---|
| Usable capacity | ~80–90% | ~40–50% if you want lifespan |
| Cycle life | 4,000–6,000+ | 500–1,200 |
| Maintenance | None | Often needs checks, equalizing, water (flooded) |
| Weight / size | Smaller, lighter | Big and heavy |
| Best use case | Daily home solar battery bank | Rarely cycled backup, very low budget |
For home energy storage systems, LiFePO4’s higher upfront price usually wins on total cost per kWh cycled.
If you want a plug‑and‑play option, look at server rack LiFePO4 battery systems for home like the ones we build for home lithium battery storage.
12V vs 24V vs 48V for DIY Home Battery
Voltage choice affects cable size, efficiency, and future expansion.
General rule of thumb:
| System Size / Use | Recommended Voltage |
|---|---|
| Small backup (300–1,000W), RV, tiny cabin | 12V |
| Mid‑size (1–3kW) shed, small off grid home battery system | 24V |
| Whole‑home / larger backup (3–10kW+) | 48V |
Why higher voltage (48V) is better for home:
- Thinner cables = lower cost and easier wiring
- Less voltage drop on long runs
- Most modern hybrid inverter for home solar systems are optimized for 48V
- Easier to scale to whole house battery backup
For serious residential solar plus storage, I usually standardize on 48V from day one.
How Much Storage Do You Really Need? (Quick kWh Examples)
Use this to size your home solar battery bank and diy home battery backup:
| Use Case | Typical Size | What It Covers (Approx.) |
|---|---|---|
| Minimal backup | 2–5 kWh | Router, lights, phone/PC, small fridge for a few hours |
| Essential loads | 5–10 kWh | Fridge, lights, Wi‑Fi, a few outlets, maybe gas boiler fan overnight |
| Comfortable backup | 10–20 kWh | Most of the home except big loads (AC, electric oven, EV) |
| Near whole‑home | 20–40 kWh | Large homes, partial central AC, longer outages, time of use energy storage |
Rough daily energy logic:
- Check your bill: if you use 20 kWh/day, a 10 kWh battery gives you about ½ day of autonomy on essentials.
- For TOU savings (charge off‑peak, use on‑peak), 1/3 to 1/2 of your daily use stored is often enough.
You can also use ready‑made battery storage for home solutions we offer to match common kWh sizes and keep design simple: battery storage for home.
Start Small, Plan for Expansion
You don’t need a full whole house battery backup on day one.
Smart approach for a diy powerwall project:
- Start with a core rack
- 5–10 kWh LiFePO4 server rack battery
- 48V hybrid inverter with more battery input capacity than you need now
- Design for parallel growth
- Choose batteries that can be paralleled easily (same model / brand)
- Leave space in the rack / wall for extra packs
- Oversize your main DC breakers and busbars slightly (within code)
- Add as you learn
- Year 1: backup + basic TOU savings
- Year 2–3: add more kWh, more solar, maybe integrate an EV charger or generator
This staged route keeps your diy home energy storage project safe, affordable, and future‑proof without locking you into a single “all‑or‑nothing” decision.
Core Components of a DIY Home Energy Storage System
To build a safe, reliable DIY home energy storage system, you need to know the main building blocks and how they work together. Here’s the simple breakdown.
Battery cells, packs & server rack batteries
For DIY home battery storage, most people today go with LiFePO4 (lithium iron phosphate):
- Cells – individual units (often prismatic) that you wire in series/parallel.
- Packs – pre-built batteries with a BMS already inside.
- Server rack batteries – plug‑and‑play units (usually 48V) that slide into a rack, easy to scale and maintain.
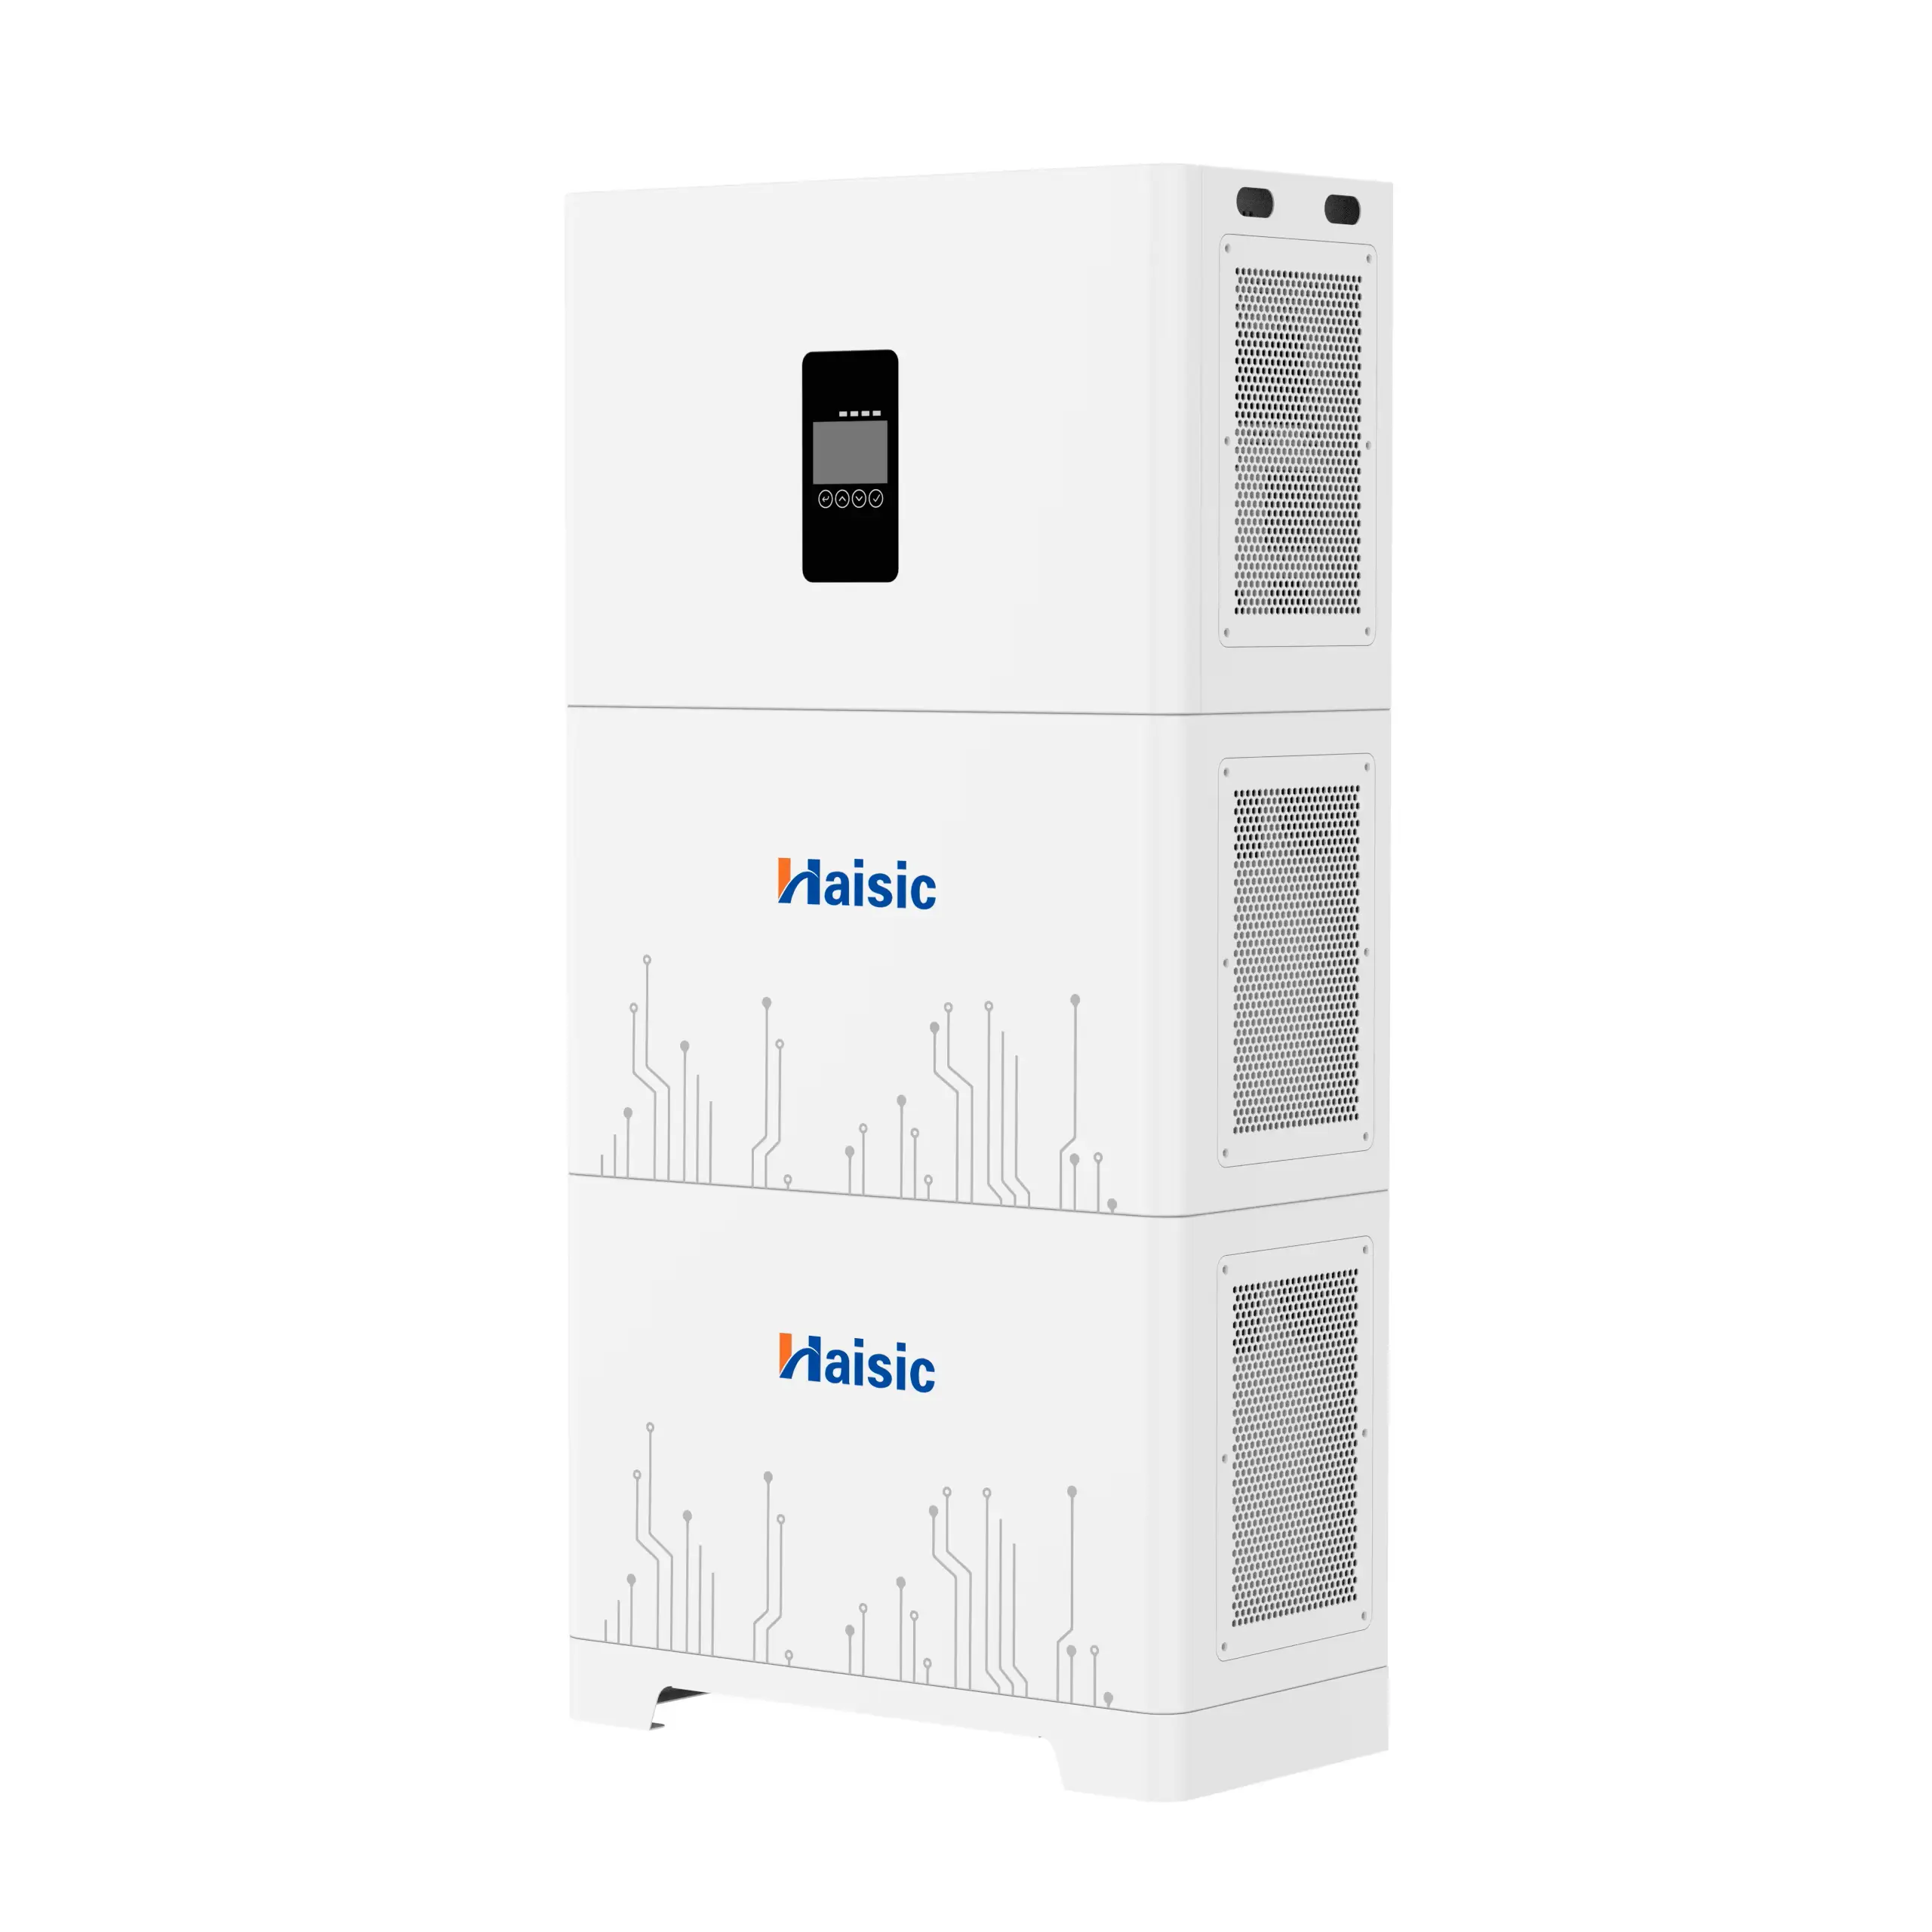
If you don’t want to assemble raw cells yourself, a pre‑built 48V LiFePO4 rack battery (like a compact 15kWh LiFePO4 solar battery pack) is usually the cleanest and safest route for home energy storage.
Battery Management System (BMS) basics
The BMS is the “brain” of your DIY home battery backup:
- Monitors cell voltage, temperature, and current
- Stops charging if cells go too high, and stops discharging if too low
- Balances cells so they age evenly and stay safe
- Talks to your inverter/charger or monitoring system
For LiFePO4 home energy storage, a properly sized, reputable BMS is non‑negotiable for safety and battery life.
Inverters & hybrid inverter systems
Your battery is DC; your home runs on AC. That’s the inverter’s job:
- Inverter/charger – converts DC↔AC and can charge the battery from the grid
- Hybrid inverter for home solar – combines inverter, solar charge controller, and charger in one unit; handles solar + grid + battery together
For grid‑tied solar battery storage, a hybrid inverter with backup function makes it much easier to run whole house battery backup or at least critical loads when the grid goes down.
Charge controllers for solar battery charging
If your DIY home energy storage is connected to panels, you need a solar charge controller (unless it’s built into a hybrid inverter):
- MPPT controllers maximize power from solar panels
- Control battery charging voltage and current
- Protect batteries from overcharge
Match your controller to your array voltage, battery voltage (12V/24V/48V), and solar wattage.
Disconnects, fuses, breakers & wiring
This is where a lot of DIY powerwall projects get risky if done wrong:
- DC disconnects to safely isolate batteries and solar
- Fuses / DC breakers sized correctly for your cable and current
- Proper cable sizing to prevent overheating and voltage drop
- Enclosure and labeling so everything is clear and serviceable
Treat your DIY home battery storage like a real electrical installation, not a hobby project on a shelf.
Monitoring apps, shunts & smart meters
A good home battery monitoring system saves you money and catches problems early:
- Shunt-based meters accurately track amps in/out and State of Charge (SoC)
- Smart BMS and inverters with Wi‑Fi or RS485 give app access and data logs
- Smart meters / CT clamps show grid import/export and help with time‑of‑use energy storage tuning
If you’re planning a more serious residential solar plus storage setup, consider components that can integrate into a larger battery energy storage system similar in concept to industrial units like a containerized battery storage system—just scaled down for home.
Put these core pieces together correctly, and you’ve got a solid, safe DIY home energy storage system that can handle outages, shave peak rates, and move you closer to real home energy independence.
Planning Your DIY Home Energy Storage Build
When you plan a DIY home energy storage system, the goal is simple: build something safe, useful, and upgradeable without wasting money.
Set clear goals and a real budget
Decide what you actually want from your DIY home battery storage before buying anything:
- Backup only: Keep lights, Wi‑Fi, fridge, and a few outlets on during outages.
- Bill savings: Charge batteries off‑peak and use them during peak rates (time‑of‑use energy storage).
- Partial or whole‑house backup: Power critical circuits vs. running everything.
From there, set a budget range and stick to it. Price out:
- Batteries (LiFePO4 home energy storage is the sweet spot for most homes)
- Hybrid inverter for home solar
- Solar charge controller for batteries (if using solar)
- Cables, breakers, fuses, enclosures, labor (if any electrician work is needed)
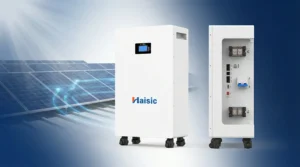
If you decide later that a more plug‑and‑play solution makes more sense than a fully custom DIY powerwall project, you can compare your design to a pre‑built 10kWh wall‑mounted home energy storage system like this compact residential battery unit.
Choose a safe install location and layout
Your DIY home energy storage system needs a clean, dry, and stable place:
- Best spots: Utility room, basement, dedicated storage room, insulated garage wall.
- Avoid: Bedrooms, cramped closets, direct sun, damp basements, or anywhere prone to flooding.
- Keep good airflow and stable temps; LiFePO4 batteries hate extreme heat or freezing.
- Plan a layout on the wall or rack so batteries, inverter, and disconnects are accessible and not stacked in a mess.
If you expect to scale up later (extra server rack batteries or parallel racks), reserve wall or floor space from day one.
Design your system diagram before buying parts
Never shop blind. Sketch a simple system diagram first:
- DC side: Solar panels → solar charge controller → battery bank + BMS → inverter/charger
- AC side: Grid → main panel → transfer switch / backup subpanel → backed‑up loads
Label:
- System voltage (12V, 24V, or 48V)
- Number of batteries and total kWh
- Wire sizes, fuses, DC and AC disconnect switches
- Monitoring gear (home battery monitoring system, shunt, app)
This prevents mismatched parts and helps your electrician and insurance understand the setup.
Check codes, permits, and insurance first
Even for a DIY off‑grid power system or residential battery backup, local rules still matter:
- Some areas require permits for battery storage systems above a certain kWh.
- Grid‑tied solar battery storage usually needs inspection and utility approval.
- Your home insurance may want photos, specs, or proof that a licensed electrician handled AC wiring.
A quick call to your local building department and your insurer upfront can save you headaches later.
Decide what you’ll DIY vs. what an electrician must do
For most DIY home energy storage builds, a clean split works best:
You can usually DIY:
- Mounting batteries and inverter
- Low‑voltage DC wiring (if you follow lithium battery safety best practices)
- Setting up the battery management system for LiFePO4
- Installing the home battery monitoring system and tuning basic settings
Bring in an electrician for:
- AC wiring to your main panel or backup subpanel
- Transfer switches or interlock kits
- Whole house battery backup integration with the grid
- Final safety check before long‑term use
If you ever scale up to a higher‑power setup (say, moving toward a more serious residential solar plus storage system similar in spirit to a larger all‑in‑one ESS), having that early professional wiring and layout will make upgrades smoother and safer.
Building a DIY Battery Pack for Home Energy Storage
Building your own DIY home battery storage pack is where the fun (and real responsibility) starts. If you do it right, you get a safe, long‑lasting lithium iron phosphate home battery that can power your home for years.
Prismatic vs Pouch vs Cylindrical Cells
For home energy storage systems, prismatic LiFePO4 cells are usually the best choice:
- Prismatic cells
- High capacity per cell (100–300Ah+), perfect for home solar battery banks
- Easier busbar connections and cleaner builds
- Ideal for server rack battery systems and “DIY powerwall” style setups
- Pouch cells
- Light and compact but harder to compress and protect long term
- Easier to damage and swell if mistreated
- Cylindrical cells (e.g., 18650/21700)
- Great for DIY powerwall projects, but too many connections for most home users
- More time, more spot-welding, more failure points
For most DIY home battery backup builds, I stick with prismatic LiFePO4 cells or ready‑made 48V rack batteries, similar to a 48V 100Ah LiFePO4 rack-mounted battery pack — faster, safer, and easier to scale.
Series and Parallel in Plain English
You only need one simple rule:
- Series = more voltage
- Connect positive to negative in a chain
- Example: 16 LiFePO4 cells in series ≈ 51.2V (good for 48V home systems)
- Parallel = more capacity (Ah/kWh)
- Connect positives together and negatives together
- Same voltage, but more stored energy
Think of series as stacking batteries taller (higher voltage) and parallel as making the stack wider (more hours of runtime).
Balancing Cells and Setting Up the BMS
To keep a DIY home battery storage system healthy and safe:
- Top-balance cells before final assembly
- Charge all cells to the same voltage (usually ~3.45–3.65V)
- Install a Battery Management System (BMS) sized for your current and voltage
- One sense lead per cell in series
- Set correct LiFePO4 parameters: high/low voltage, charge/discharge limits, temp limits
- Let the BMS do the work:
- Cell balancing
- Over/under-voltage protection
- Overcurrent and temperature protection
A good battery management system for LiFePO4 is non‑negotiable in any residential battery backup build.
Mounting Cells and Preventing Damage
Physical protection matters just as much as wiring:
- Keep cells clamped or compressed (especially pouch and prismatic)
- Use non‑conductive supports (plastic, wood, or proper battery frames)
- Protect terminals from tools, kids, and pets
- Avoid spots with moisture, vibration, or direct sun
- Put packs inside a ventilated, solid enclosure or metal rack cabinet
This is even more important on higher-voltage home energy storage systems like a 256V LiFePO4 battery pack, where physical damage can be much more dangerous.
Testing Voltage, Capacity, and Basic Performance
Before you trust your DIY home battery backup with your house:
- Check voltage
- Each cell at rest: around 3.2–3.3V (LiFePO4)
- Whole pack matches your design voltage (12V/24V/48V/etc.)
- Do a controlled capacity test
- Fully charge, then discharge at a safe current through a meter/shunt
- Compare measured Ah/Wh to the rated values
- Watch for
- Cells that drift in voltage
- Excessive heating under load
- BMS cutting off unexpectedly
If numbers look off, fix it now — not during the first outage. A properly tested DIY home battery storage pack will give you reliable home backup power without surprises.
Wiring and System Integration for DIY Home Energy Storage
Safe DC wiring practices and cable sizing
For any diy home energy storage or diy home battery storage setup, DC wiring is where most real risk sits. I always treat the battery side like a live fuel line:
- Use proper DC cable (fine‑strand, rated for at least 90°C, correct insulation).
- Size cables for amps + distance: higher current or longer runs = thicker wire (bigger mm² / AWG). Use online DC cable calculators and always oversize a bit.
- Keep runs short and tidy to cut voltage drop and heat.
- Protect every positive line with a fuse or DC breaker close to the battery.
- Never mix random automotive cables and house wire on a serious home energy storage system.
Connecting batteries to the inverter and BMS
Whether you’re using loose prismatic LiFePO4 cells or a server rack battery system, the basics are the same for a diy powerwall project:
- BMS first: cells → BMS → main DC bus → inverter. The BMS controls charge/discharge and protects lithium iron phosphate home batteries.
- Follow polarity carefully: positive to positive, negative to negative, double‑check with a meter before you land anything on the inverter.
- Use proper lugs, crimped with a hydraulic crimper, not hammered or squashed.
- Tighten busbars and terminals to spec; loose connections are a fire risk.
- For pre‑built cabinets or 51.2V home energy battery modules, follow the manufacturer’s linking and communication (CAN/RS485) instructions so the BMS and hybrid inverter for home solar can talk properly.
Grounding and bonding for home battery systems
Grounding is what keeps a diy home battery backup from turning dangerous:
- Bond the system to your home’s grounding system (ground rod / main panel ground bar) as required by your local code.
- Metal racks, enclosures, and inverter chassis should be grounded with dedicated ground wire.
- Negative‑to‑ground bonding rules differ between off grid home battery systems and grid tied solar battery storage; this is where a licensed electrician is usually worth it.
AC side wiring basics and transfer switches
On the AC side, treat the inverter like a small sub‑panel feeding your essential loads or whole house battery backup:
- Use proper AC cable and breakers rated for your inverter’s output (e.g. 16A, 32A).
- For backup power during outage, install a manual or automatic transfer switch or backed‑up sub‑panel. Never back‑feed a house circuit through an inlet without a proper interlock.
- Grid‑tied residential solar plus storage must follow local interconnection rules—this is not the place to “wing it.”
If you’re unsure, get an electrician to handle the AC tie‑in while you focus on the diy solar and battery setup on the low‑voltage side.
Labeling, cable management, and enclosure setup
Clean wiring isn’t just about looks; it’s about safety and troubleshooting:
- Label everything: battery bank, inverter input/output, DC disconnects, solar charge controller for batteries, grid input, backed‑up loads.
- Use cable trays, clamps, and velcro ties for cable management; avoid tight bends and crossing DC and AC bundles where possible.
- Put your home solar battery bank in a dedicated enclosure or battery cabinet: fire‑resistant, dry, ventilated, and locked away from kids and pets.
- Keep clear working space around inverters, breakers, and disconnects so you can service or shut down quickly.
Done right, wiring and system integration turn a pile of parts into a reliable diy home energy storage system that’s safe, easy to expand, and simple to maintain.
Connecting DIY Home Energy Storage to Solar Panels
How solar charge controllers work with batteries
To connect DIY home battery storage to solar panels safely, you need a solar charge controller between the panels and the battery bank. Its job is simple:
- It takes the higher, unstable DC voltage from your solar array and turns it into a safe charging voltage for your LiFePO4 home energy storage or lead‑acid bank.
- It prevents overcharging, over‑discharging (with some models), and maximizes solar harvest (MPPT controllers).
For most diy home battery storage builds, use an MPPT solar charge controller sized for:
- Your panel string voltage (Vmp/Voc)
- Your battery bank voltage (12/24/48V)
- The max array power in watts
If you plan to grow your system, oversize the controller a bit from day one.
Hybrid inverter setups: solar, grid, and battery together
A hybrid inverter for home solar is the brain of a modern home energy storage system. It can:
- Take power from solar panels, the grid, or your battery bank
- Prioritize solar, then battery, then grid (or any order you set)
- Provide home backup power during outage with automatic transfer
For most grid-connected homes, a hybrid inverter is cleaner and easier than mixing separate inverters and chargers. For example, a 10 kW IP65 hybrid solar inverter with built‑in MPPT and battery support (like this style of single‑phase hybrid solar inverter) lets you:
- Plug panels directly into the PV inputs
- Connect your DIY battery bank via DC terminals
- Feed power to your main panel and export to the grid where allowed
Off‑grid solar battery systems for cabins and sheds
For cabins, sheds, or tiny homes away from the grid, a diy off grid power system is usually simpler:
- Solar panels → MPPT charge controller → battery bank → off‑grid inverter → loads
- Size the home solar battery bank to cover nights + cloudy days
- Consider 24V or 48V for anything above ~2–3 kW to keep cable sizes reasonable
Key tips:
- Design around essential loads only (lights, fridge, router, maybe a well pump)
- Use high‑efficiency appliances (DC fridges, LED lights, induction cooktops)
- Keep the battery system in a dry, ventilated, temp‑stable space
Grid‑tied battery storage with backup power
In cities and suburbs, most people want grid tied solar battery storage that works day‑to‑day and still gives residential battery backup when the grid fails. A hybrid inverter with backup output is the go‑to:
- Normal mode: solar powers the home, extra goes to the battery or grid
- Outage mode: a protected “backup” subpanel is powered by solar + battery
Look for:
- UPS‑style switchover (10–20 ms) so devices don’t drop
- Enough surge power for fridges, pumps, or A/C
- Good monitoring app so your home battery monitoring system is easy to use
A mid‑size 5–6 kW hybrid inverter (such as a 6 kW IP65 hybrid inverter with MPPT) fits most small to medium homes.
Planning for future panel and battery expansion
Most diy solar and battery setup projects grow over time, so design for expansion from day one:
For panels:
- Leave extra capacity on your MPPT input (e.g., use 3–4 kW now on a 6 kW MPPT)
- Use standard panel sizes and voltages so adding strings later is easy
- Make roof and rail layouts that can accept more modules
For batteries:
- Choose a flexible voltage (usually 48V for whole house battery backup)
- Use modular server rack battery system or standardized LiFePO4 packs
- Leave room in your battery cabinet and on your DC bus bars for extra units
If you treat your diy home energy storage like LEGO—modular and upgradable—you’ll save money, avoid re‑wiring, and keep your options open as your power needs change.
Safety Rules and Best Practices for DIY Home Energy Storage
If you’re building a DIY home energy storage system, safety is non‑negotiable. Done right, a LiFePO4 home battery can be safer than old lead‑acid setups. Done wrong, it can burn your house down. Here’s what I stick to on every project.
Fire risks with lithium (and how to reduce them)
Lithium batteries don’t just “randomly explode.” Almost every fire comes from one of these:
- Wrong charger or wrong settings
- No proper Battery Management System (BMS)
- Poor connections, loose lugs, or undersized cables overheating
- Physical damage, water damage, or short circuits
To keep your DIY home battery storage safe:
- Use LiFePO4 only for home systems (much more stable than other lithium chemistries).
- Buy quality packs or cells with a real BMS (not generic, no‑name boards).
- Keep batteries in a dry, clean, non‑flammable area (concrete floor, metal rack, or steel cabinet).
- Add smoke/temperature sensors in the battery room, tied to your home alarm if possible.
If you’re going with a server rack battery system (for example, a ready‑made 48V or 128V LiFePO4 rack module), fire risk is lower than a hand‑built pack, as long as you install it correctly.
Ventilation, temperature control, and clearances
Your home energy storage system doesn’t need a wind tunnel, but it does need airflow and stable temps:
- Ideal battery temp: 10–30°C (50–86°F).
- Avoid direct sun, roof spaces that hit 50°C+, and damp basements.
- Leave at least 10–15 cm (4–6 in) clearance around packs/inverters for airflow and wiring.
- Don’t block inverter or BMS vents. Dust and heat kill electronics slowly.
If your climate swings hard (very hot or cold), plan:
- Insulated enclosure or small climate‑controlled closet.
- Never charge LiFePO4 below 0°C unless the battery has built‑in heating.
Fuses, overcurrent protection, and disconnects
On a diy home energy storage build, wiring is usually where things go wrong. I follow this rule: every positive cable that can carry serious current gets protection.
At minimum:
- Main DC fuse or breaker right off the battery bank.
- Additional fuses/breakers for each string, inverter feed, and solar charge controller feed.
- A lockable DC disconnect between battery and inverter.
- Proper AC breakers on the grid side, sized to code and to inverter rating.
Use:
- Correct gauge cable for the current (oversize, don’t guess).
- Proper lugs, crimped with a real hydraulic crimper.
- No automotive blade fuses or random car breakers for high‑power home systems.
What not to do with DIY lithium batteries
A short “never” list for your diy home battery backup:
- Never charge lithium with a charger/inverter set up for lead‑acid “just because it works.”
- Never bypass, disable, or oversize past the BMS ratings.
- Never stack bare cells loosely or strap them with ratchet straps and hope for the best.
- Never mount batteries above a heat source (inverter radiator, water heater, furnace).
- Never leave loose tools, metal, or junk near open battery terminals.
- Never run batteries in the living room, bedroom, or near flammable clutter if you can avoid it.
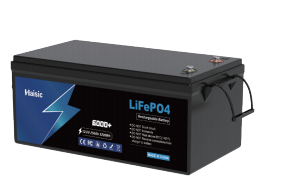
If you’re not ready to build packs from raw cells safely, start with a pre‑built LiFePO4 battery like a 12V LiFePO4 deep‑cycle unit and scale from there.
When to call an electrician or inspector
DIY doesn’t mean “no professionals.” I involve a licensed electrician when:
- Tying a grid‑tied solar battery storage system into the main panel.
- Installing or wiring a critical loads / transfer switch.
- Dealing with 240V circuits, whole‑house backup, or EV charger integration.
- Local code requires permits or inspections for residential battery backup.
You should absolutely:
- Check local electrical code and utility rules before you buy hardware.
- Get an inspection if your system connects to the grid or backs up your main panel.
- Involve a pro if you’re not 100% sure about AC wiring, bonding, or grounding.
A diy solar and battery setup can be safe, reliable, and powerful, but only if you treat lithium, wiring, and grid connections with real respect.
Costs, Savings, and Realistic Payback for DIY Home Energy Storage
Cost Breakdown of a DIY Home Battery System
For a solid DIY home battery storage setup, your main costs are:
- Batteries (40–60%) – For example, a quality 48V LiFePO4 rack battery (around 5 kWh) usually runs $1,000–$1,800, depending on brand, warranty, and capacity. Higher‑capacity units like a 51.2V 400Ah LiFePO4 rack battery with ~20 kWh usable storage cost more upfront but give you better $/kWh in the long run.
- Inverter / hybrid inverter (20–30%) – A good hybrid inverter for home solar (5–10 kW) typically costs $700–$2,000.
- Solar charge controller (if separate), disconnects, fuses, wiring, enclosures (10–20%) – Usually $300–$1,000 total.
- Misc + electrician (if needed) (10–20%) – Breakers, transfer switch, permits, inspection: $300–$1,000+ depending on your local rules.
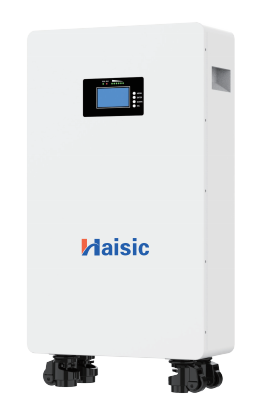
For reference, a compact 51.2V 100Ah LiFePO4 server rack battery (about 5 kWh) like a rack‑mount 51.2V 100Ah LiFePO4 home storage battery is a sweet spot for small DIY home battery backup builds.
DIY vs Tesla Powerwall (and Other Commercial Options)
DIY home battery storage vs commercial systems (Tesla Powerwall, LG, etc.) usually comes down to:
- Cost per kWh
- DIY LiFePO4 home energy storage: often $200–400 per usable kWh (all‑in, if you shop smart).
- Tesla Powerwall / branded systems: often $700–1,200 per usable kWh installed.
- Flexibility
- DIY: you choose capacity (5 kWh, 10 kWh, 20+ kWh), voltage (48V is standard), and integration style (off‑grid, grid‑tied, hybrid).
- Commercial: locked ecosystem, neat app, easy support, but less flexible and harder to expand freely.
- Support & warranty
- DIY: you’re the integrator; you rely on community, manuals, and supplier support.
- Commercial: polished support, long warranties, but at a premium price.
If you’re comfortable with basic electrical work (and can bring in an electrician where needed), DIY home battery backup usually wins on value per kWh.
How Electricity Rates and TOU Pricing Affect ROI
Your return on investment (ROI) mainly depends on how you’re billed:
- Flat rate (same price day/night)
- Batteries often don’t “pay back” quickly unless you have frequent outages or unreliable grid power.
- ROI is more about resilience than strict savings.
- Time‑of‑Use (TOU) rates
- Perfect for time of use energy storage: charge from solar or cheap off‑peak grid power, discharge during expensive evening peaks.
- In markets with big TOU spreads (e.g., $0.10 off‑peak vs $0.35 peak), payback can drop to 5–8 years with daily cycling.
- Net metering rules
- If your utility pays very little for exported solar but charges a lot for what you import later, solar battery storage for home makes a lot more sense.
Using Batteries for Bill Savings vs Backup Only
There are two main use cases:
- Backup‑only DIY home battery backup
- Smaller system (e.g., 5–10 kWh), rarely cycled.
- Financial ROI is weak, but value during an outage is huge: keeping lights, fridge, Wi‑Fi, and a few plugs running.
- Think of it like an insurance policy instead of an “investment.”
- Daily cycling for savings + backup
- Larger battery bank (10–20 kWh or more) with a good hybrid inverter for home solar.
- You cycle the battery almost every day to shave peaks, reduce imports, and keep backup power during outage events.
- This is where residential solar plus storage can realistically pay for itself.
Real‑World Cost and Savings Examples (Global‑style Numbers)
These are rough, realistic ballparks for DIY solar and battery setups (battery side only, not counting solar panels):
| System Size (Usable kWh) | Typical Use Case | Rough DIY Cost (Battery + Inverter + Balance of System) | Typical Yearly Savings* | Payback Feel |
|---|---|---|---|---|
| 5 kWh | Essential loads, backup only | ~$2,000–$3,000 | Low ($0–$150/yr) | Mostly for peace of mind |
| 10 kWh | TOU savings + backup for key circuits | ~$3,500–$5,000 | ~$200–$400/yr | 8–12 years in average markets |
| 20 kWh | Whole‑home style backup + TOU optimization | ~$6,500–$9,000 | ~$400–$800/yr | 6–10 years where power is expensive |
*Assuming moderate to high electricity prices and TOU or poor net metering.
If you go with a larger, higher‑capacity LiFePO4 rack (for example a 51.2V 400Ah LiFePO4 server rack battery around 20 kWh usable), the cost per kWh usually drops, which helps shorten payback for bigger residential battery backup projects.
The bottom line: DIY home energy storage can be a smart move if your power is expensive or unreliable. You’ll save the most—and get the fastest payback—by pairing LiFePO4 home energy storage with solar, TOU rates, and daily cycling, while still having strong home backup power during outage events.
Ongoing Maintenance and Troubleshooting for DIY Home Energy Storage
Keeping a DIY home energy storage system healthy is simple if you stay consistent. A few quick checks each month and a deeper look once or twice a year will protect your investment and keep your backup power ready when you need it.
Monthly checks on your DIY home battery storage
Do a fast visual and app-based check:
-
Check the app / inverter screen
- Battery state of charge (SOC) is behaving as expected.
- No BMS alarms, inverter faults, or high temperature warnings.
- Charge/discharge power looks normal for your usage.
-
Physical inspection
- No bloated cells, damaged cables, or loose terminals.
- No burning smell, discoloration, or melted plastic.
- Fans and ventilation paths clear of dust and clutter.
-
Quick performance check
- System switches to home backup power during an outage the way you designed it.
- Voltage and SOC readings are stable under normal house loads.
Yearly checks on a home energy storage system
Once or twice a year, go a bit deeper:
-
Tighten and clean connections
- Re-torque battery busbars, lugs, and breakers (per manufacturer spec).
- Clean any corrosion on DC and AC terminals.
-
Review battery health
- Check cycle count, remaining capacity, and cell balance in the BMS.
- Compare usable kWh today with what you got when the system was new.
-
Test your backup plan
- Simulate a grid outage and confirm your DIY home battery backup powers the loads you expect.
- Verify transfer switch / hybrid inverter behavior.
If you’re using a rack solution like a modular server rack LiFePO4 battery system, a quick annual check on all modules, communication cables, and mounting hardware is usually enough to stay ahead of problems. For example, a pre-built 48V LiFePO4 server rack battery pack around 5 kWh makes monitoring and yearly checks much simpler than loose cells.
Watching battery health, cycles, and SOC
For lithium iron phosphate home battery systems (LiFePO4), tracking health is mostly done in software:
-
Key numbers to watch
- SOC range: Try to live mostly between 10–90% for long life.
- Cycle count: Higher cycles are fine if temperatures are kept in range.
- Cell balance: Cell voltages within a few mV of each other at rest.
-
Red flags
- One cell drifting high or low compared to the rest.
- Sudden loss of capacity (you can’t get close to rated kWh anymore).
- Battery or BMS frequently hitting high-temp or low-temp cutoffs.
Common DIY battery problems and simple fixes
Most issues with a diy home battery storage setup are basic and easy to solve:
-
System shuts down under load
- Likely BMS overcurrent or low-voltage cutoff.
- Fix: lower inverter power limits, improve cable sizing, or check for loose connections.
-
Inverter won’t start or keeps rebooting
- Often wiring, incorrect battery voltage setting, or wrong battery type profile.
- Fix: confirm 12V vs 24V vs 48V settings, battery cutoff values, and BMS communication.
-
SOC reading is way off
- BMS or shunt needs re-calibration.
- Fix: do a full charge to 100%, let it rest, then reset SOC in the BMS / app.
-
Uneven cell voltages
- Cells out of balance due to storage or heavy cycling.
- Fix: use the BMS balancing function; if needed, top-balance cells slowly before reconnecting.
With pre-assembled LiFePO4 packs such as a compact 48V 2.56 kWh LiFePO4 home battery module, most of these “DIY cell” problems are handled inside the pack’s integrated BMS.
Firmware, apps, and tuning inverter settings
Modern residential solar plus storage systems are software-driven. Don’t ignore updates:
-
Update firmware safely
- Only update when the system is stable (not during storms or outages).
- Follow the manufacturer’s process for the inverter, BMS, and monitoring app.
-
Tune basic settings
- Charge and discharge limits (e.g., don’t discharge LiFePO4 to 0% every day).
- Max charge current to protect batteries and wiring.
- Time-of-use energy storage logic: charge when grid is cheap, discharge when expensive.
-
Backup mode vs savings mode
- Backup priority: keep a high minimum SOC (e.g., 40–60%) in case of outages.
- Bill savings: allow deeper discharge during peak pricing, but still avoid abuse.
When to repair, replace, or upgrade your DIY home energy storage
You don’t need to touch a stable system just because it’s old, but there are clear triggers for action:
-
Repair (or call a pro) when:
- You see or smell any sign of overheating or burning.
- There’s physical damage to cells, busbars, or high-voltage wiring.
- BMS or inverter throws repeating critical faults you can’t clear via settings.
-
Replace when:
- Usable capacity has dropped so much that your home battery backup no longer covers even your essential loads.
- A single pack has failed internally and can’t be safely brought back into spec.
-
Upgrade when:
- Your energy use has grown (EV, heat pump, more AC) and your original home solar battery bank is undersized.
- You want better ROI from time-of-use optimization and need more kWh to ride through peak pricing.
- Your older chemistry (like flooded lead-acid) has become high-maintenance compared to modern LiFePO4.
If you stay on top of these simple maintenance and troubleshooting steps, your diy home energy storage system will stay safe, efficient, and ready to deliver the home energy independence you built it for.
Scaling Up DIY Home Energy Storage

When you move from a small diy home battery backup to a full diy home energy storage system, the mindset has to shift from “just keep the lights on” to “run the house safely and efficiently.”
From small backup to whole‑home storage
If you start with a single lithium iron phosphate home battery for outages, you can scale by:
- Adding more batteries in stages – stack extra LiFePO4 home energy storage modules as budget allows.
- Upgrading to a higher‑power inverter – for whole house battery backup, look at a 6–12 kW hybrid inverter for home solar that can run heavy loads. A three‑phase hybrid unit like an 8–12 kW hybrid solar inverter is ideal if your home or small business uses three‑phase power (example of a 3‑phase hybrid solar inverter).
- Separating “must‑run” and “nice‑to‑have” circuits – even with whole‑home storage, keep an “essential loads” sub‑panel to avoid accidental overloads.
Parallel battery racks and higher voltage
For bigger diy home battery storage setups:
- 48V systems are the sweet spot – more efficient and safer to wire than low‑voltage monsters.
- Use server rack battery systems in parallel – e.g., 3–6 rack batteries tied to one hybrid inverter, each with its own BMS.
- Plan busbars and fusing properly – every parallel string needs its own fuse or breaker; don’t just tie big cables together and hope for the best.
Larger installs sometimes step up to containerized battery banks (for farms, workshops, or microgrids). That’s where 50–100 kWh containerized energy storage systems make sense for serious off grid home battery systems or commercial backup (50–100kWh containerized storage example).
Integrating EV chargers and portable power
Your diy solar and battery setup can do more than just run lights:
- Smart EV charging – charge your EV when solar is high or grid prices are low (time of use energy storage). Look for EV chargers that talk to your hybrid inverter or energy management app.
- Portable home backup batteries – use smaller portable stations as flexible add‑ons for fridges, tools, or remote workspaces instead of wiring everything into the main panel.
- Bidirectional EVs (V2H/V2G) – if supported where you live, your EV can become a mobile home battery bank, but this usually needs certified hardware and installers.
Generators + batteries for hybrid backup
For serious reliability, combine a residential battery backup with a generator:
- Use an inverter/charger with generator input – let the system auto‑start the generator when batteries get low.
- Right‑size the generator – just big enough to cover peaks and recharge the home solar battery bank, not to run everything at once forever.
- Run the generator short and hard – let the batteries handle the noise‑free load the rest of the time.
This hybrid backup approach cuts fuel use, noise, and wear on the generator, while the battery handles most day‑to‑day power.
Learn from DIY home battery communities
If you’re pushing into advanced diy powerwall projects or high‑capacity lifepo4 home energy storage:
- Join active forums and groups – DIY solar, diy powerwall, and off‑grid communities share real test data, wiring diagrams, and failure stories.
- Share your build log – photos, wiring diagrams, and settings help others catch mistakes before they cost you gear or create a safety risk.
- Follow people with long‑running systems – prioritize advice from builders who have years of runtime, not just shiny new installs.
Scaling diy home energy storage is absolutely doable if you go step‑by‑step: start small, design for expansion, and lean on the community and standards whenever you move into higher voltages and larger battery banks.
Choosing Quality Parts and Reliable Suppliers for DIY Home Energy Storage
When you build a DIY home energy storage system, your parts and suppliers matter as much as your design. Cheap, unknown components can kill battery life, void insurance, or become a safety risk. I always tell people: treat this like building the “electrical heart” of your home.
How to judge cell and battery pack quality
For LiFePO4 home energy storage and DIY home battery storage, look for:
-
Honest, detailed specs
- Capacity (Ah) and voltage listed clearly
- Rated cycles at a given depth of discharge (e.g. 6000 cycles @ 80% DoD)
- Operating temperature range
-
Certifications and test reports
- CE, UL, IEC, UN38.3 where possible
- Third‑party test sheets, not just marketing PDFs
-
Consistent, matched cells
- Same batch and date codes
- Tight capacity tolerance (±3% or better)
- For packs/server racks: integrated BMS, clear wiring, solid busbars
If you prefer ready-to-use modules, a pre-built 5kWh LiFePO4 battery pack like this server rack home battery can save you a lot of time and reduce wiring mistakes.
Avoiding fake or low‑grade lithium cells
The cheap cells flooding the market are where most DIY powerwall project failures start. Watch out for:
- Suspiciously low prices vs known brands
- No-brand cells with sanded or reprinted labels
- Sellers refusing to share test data or real photos
- Unrealistic specs (e.g. 300Ah cells that weigh far less than reputable ones)
If you’re not buying from a trusted source, assume capacity is exaggerated and cycles are lower than claimed.
What to look for in BMS, inverter, and cable specs
For a safe, long‑lasting home energy storage system, don’t skimp on electronics and wiring:
-
Battery Management System (BMS)
- Supports LiFePO4 chemistry and your cell count
- Adequate continuous and peak current rating
- Over/under‑voltage, over‑current, high/low temp protection
- Prefer models with Bluetooth/app or CAN/RS485 support for monitoring
-
Hybrid inverter for home solar
- Proper voltage match (48V system is ideal for most homes)
- Enough continuous power and surge to start motors (fridge, pumps)
- Certifications for your region (grid‑tie standards, anti‑islanding)
- Good support for solar input and battery charging curves
If you want an all‑in‑one approach, a hybrid solar inverter like this grid/off‑grid inverter lineup can handle solar, grid, and battery together in one box.
-
Cables and accessories
- Correct gauge (AWG) for your DC current and run length
- Pure copper, flexible, with proper lugs and heat‑shrink
- DC‑rated breakers, fuses, and disconnects from known brands
Why reliable suppliers matter for safety and lifespan
With residential battery backup, your supplier isn’t just a store; they’re your long‑term support:
- Better QC and matching of prismatic LiFePO4 cells
- Clear warranty terms and realistic cycle life claims
- Real tech support if your battery, BMS, or inverter misbehaves
- Lower risk of hidden defects that show up a year later
Reliable suppliers protect both your home backup power during outage and your investment. Unknown sellers disappear; the problems stay with you.
Checking reviews, forums, and test reports
Before you spend a dollar on DIY home battery backup parts:
-
Read user reviews focusing on:
- Actual tested capacity vs rated
- Heat, noise, and reliability under load
- Response times on warranty or failures
-
Check DIY solar and battery forums (Reddit, DIY Solar, etc.)
- Look for long‑term feedback (1+ year use)
- Pay attention to teardown photos and test graphs
-
Watch independent test videos
- Capacity tests at different currents
- BMS and inverter overload behavior
- Thermal performance at high load
If a product or seller has no real‑world testing or is only hyped by influencers with affiliate links, be careful. For DIY off grid power system and grid tied solar battery storage, boring, proven gear beats flashy but untested every time.