
Understanding DIY Backup Battery Systems
What Is a DIY Backup Battery System?
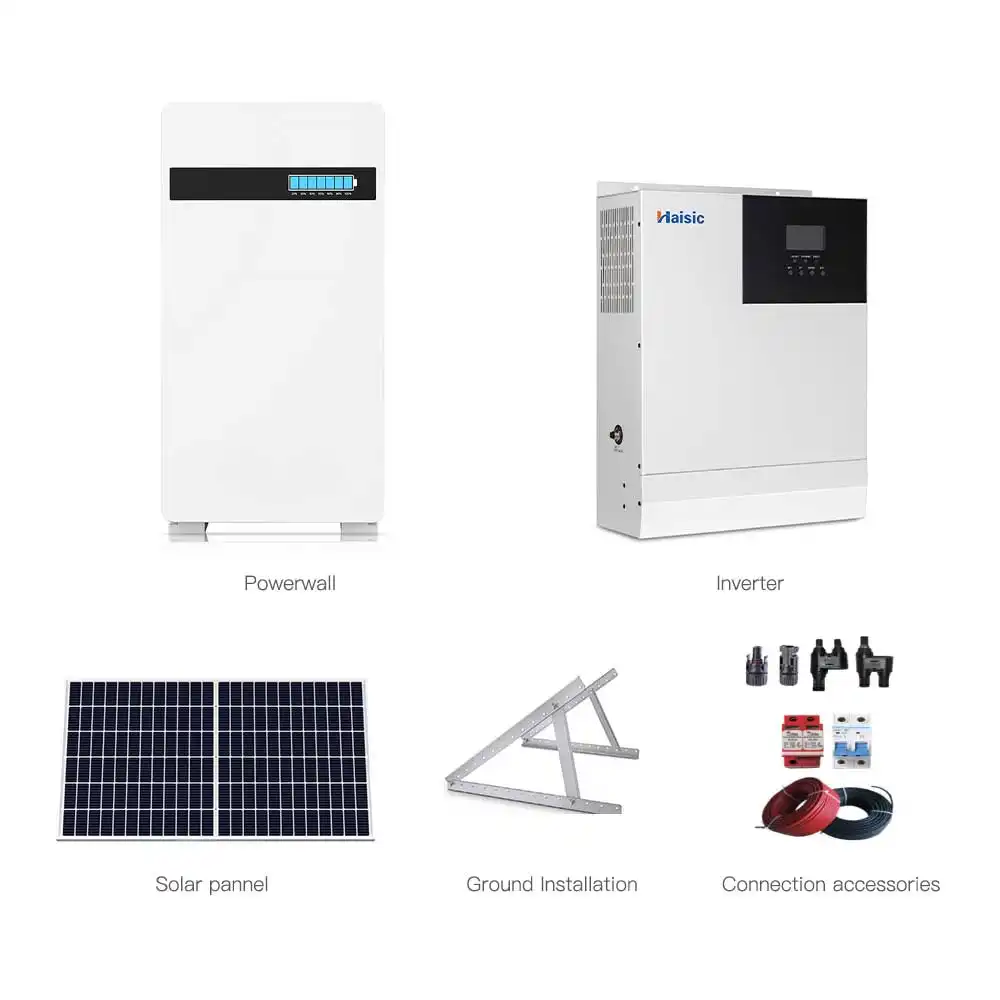
A DIY backup battery system is a power setup you build yourself to keep critical devices running when the grid goes down. Instead of relying on a noisy gas generator or waiting for the utility to fix the problem, you’ve got your own home battery backup system ready to go.
At its core, a diy battery backup is just:
- A battery bank (deep cycle or LiFePO4)
- An inverter to convert battery DC power to household AC power
- A charger or solar charge controller to refill the batteries
- The wiring, fuses, and safety gear that tie it all together
You can start small (keep your Wi‑Fi, lights, phone, and laptop running) or scale it into a whole house battery backup diy over time.
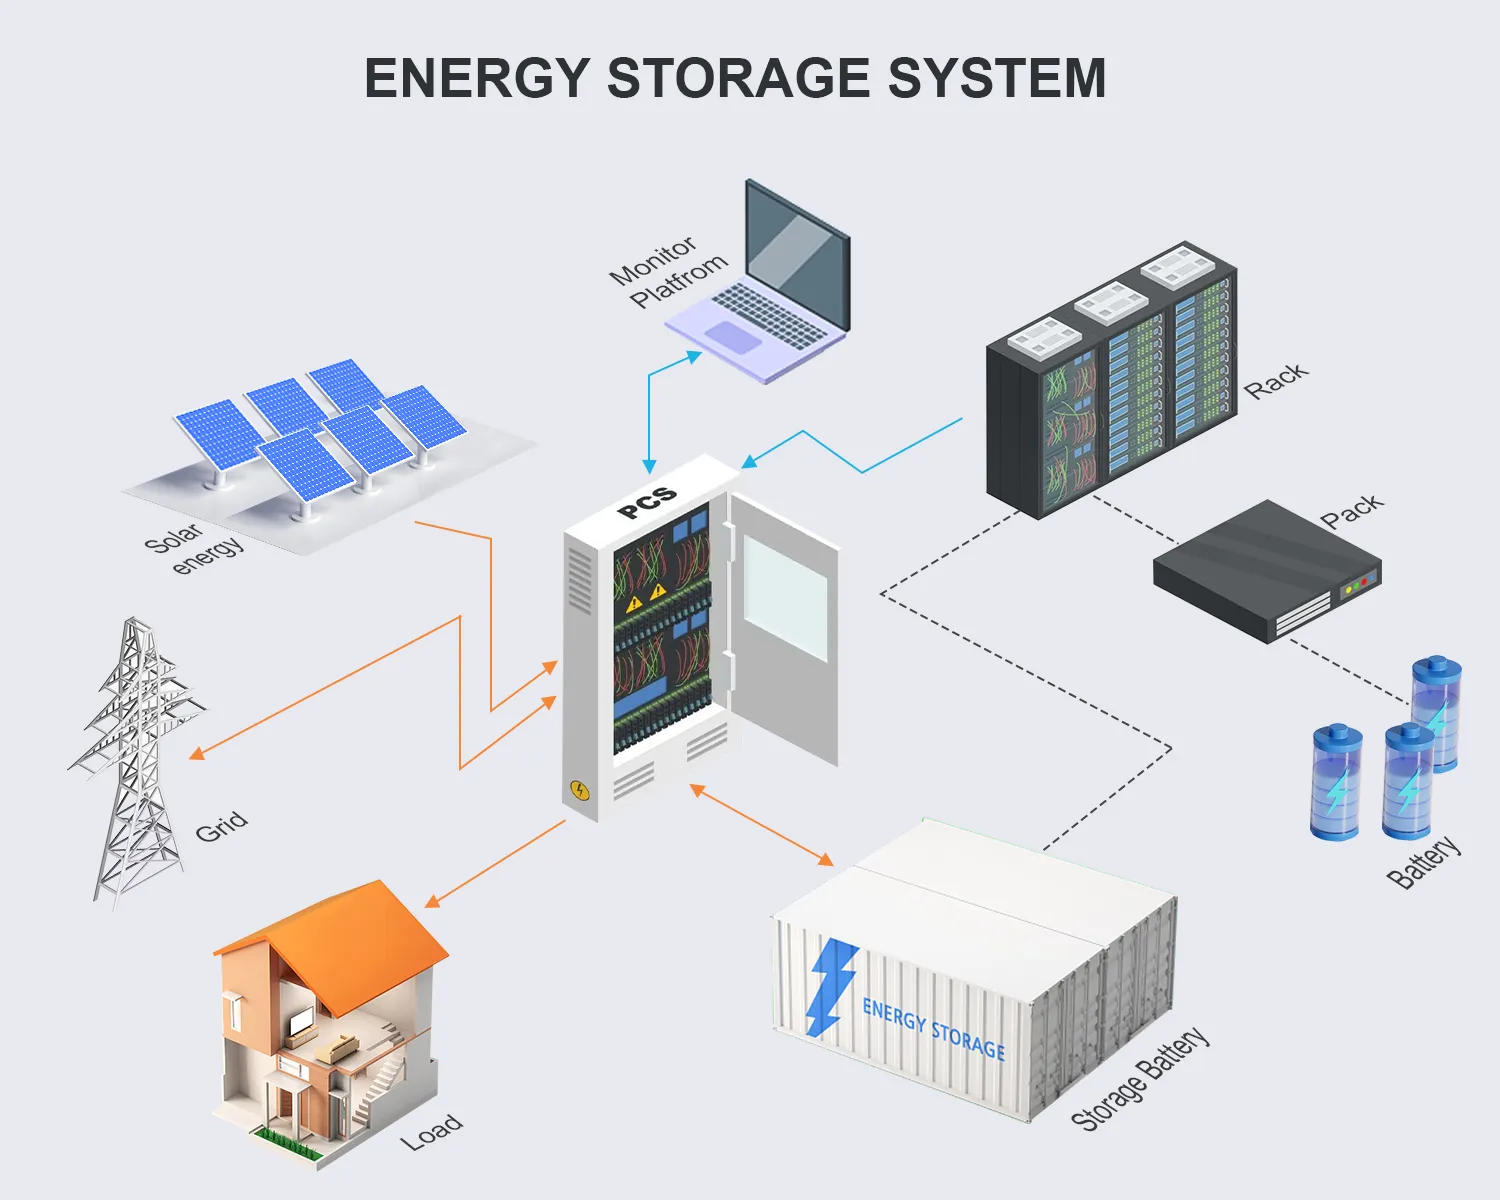
How Home Battery Backup Works
Here’s the basic power flow for a diy backup battery system:
-
Charging the battery bank
- From the wall (AC charger or inverter/charger)
- From solar panels via a solar charge controller for battery bank
- From a generator if you want a hybrid setup
-
Storing energy
- Energy is stored in 12V, 24V, or 48V backup battery systems
- Common chemistries:
- Lead-acid / AGM (cheaper, heavier)
- LiFePO4 (lithium iron phosphate battery) (lighter, safer, longer life)
-
Powering your loads
- The inverter turns DC from the battery into 120V/230V AC
- A pure sine wave inverter for backup is best for electronics, fridges, medical gear
- Power goes to:
- Individual outlets / extension cords, or
- A transfer switch or interlock feeding a subpanel or main panel
-
Protection and control
- A battery management system for diy battery (BMS) protects lithium packs
- Fuses, breakers, and disconnects protect wiring and equipment
- A battery monitoring system or app shows volts, amps, and state of charge
That’s it: charge → store → invert → use → repeat.
DIY Backup Battery vs Gas Generator
Both a battery backup diy and a gas generator keep the lights on—but they behave very differently:
DIY Backup Battery System
- Silent (huge plus at night or in apartments)
- No fuel storage or trips for gasoline
- Works indoors (with proper ventilation and safety for the battery area)
- Instant, seamless power for electronics, routers, medical devices
- Can be charged from solar battery storage for home
- Higher upfront cost, but very low operating cost
Traditional Gas Generator
- Noisy, smelly exhaust, must run outdoors
- Needs a constant fuel supply and maintenance
- Better for short, high-power use (big tools, whole-house for short periods)
- Not great for long quiet outages or indoor convenience
- Cheaper up front, expensive over years of fuel and upkeep
In many setups, people keep both: a diy solar generator / diy powerwall for quiet everyday and outage use, and a small gas generator as a last-resort backup for long blackouts.
Common Use Cases for DIY Backup Power
A diy backup battery shines in real, everyday problems like:
-
Grid outages
- Keep your fridge/freezer running (backup power for refrigerator)
- Lights, fans, phone chargers stay on
- Backup battery for WiFi and router so you can actually work or get news
-
Emergency power backup for home
- Backup battery for sump pump to avoid flooding
- Critical medical devices (CPAP, oxygen concentrators—check specs carefully)
- Security systems and cameras
-
Off‑grid battery backup / cabin / RV
- Power for lights, laptops, Starlink, water pumps
- Paired with off-grid solar battery bank for full independence
-
Portable power station diy
- Camping, vanlife, tailgating, job sites
- A compact 12V backup battery system with inverter and outlets
When a DIY Backup Battery Makes Sense for You
Building your own home energy storage diy makes sense if:
- You experience regular or long outages
- You want quiet, clean backup power you can use at night without bothering anyone
- You don’t want to deal with gas, fumes, or engine maintenance
- You’re comfortable with basic DIY electrical work and safety rules
- You want something you can upgrade over time:
- Start with a small cheap diy backup power setup
- Grow into a 24V battery backup system or 48V home battery bank
- Add solar panels later for a true off‑grid battery backup solution
If you’re after energy independence with home batteries, want to cut generator run time, and like building your own gear, a diy backup battery system is one of the most practical projects you can take on—as long as you respect the voltages, follow safety, and build it right.
Planning Your DIY Backup Battery Setup
Before you buy anything, get clear on what your diy backup battery actually needs to do. This is where most people either overspend or end up with a system that’s too weak.
Figure Out What You Need to Power
Make a simple list of “must-run” devices during an outage, not “nice to have”:
- Fridge or freezer
- WiFi router and phones
- A few LED lights
- Laptop or small PC
- Sump pump or medical devices (if needed)
Write down the watt rating from each label (or Google the model). This becomes your starting point for your diy battery backup sizing.
Calculate Wattage and Daily Energy Use
You don’t just care about watts, you care about watts x time:
- Take each device’s watts
- Estimate hours per day it will run
- Multiply: Watts × Hours = Wh (watt-hours)
- Add all Wh together = daily energy use
Example:
| Device | Watts | Hours/day | Daily Wh |
|---|---|---|---|
| Fridge | 150 | 8 | 1200 |
| WiFi + router | 20 | 24 | 480 |
| 4× LED lights | 40 | 5 | 200 |
| Laptop | 60 | 4 | 240 |
| Total | 2120 Wh (~2.1 kWh) |
This tells you roughly how much capacity your battery backup diy system needs per day.
Decide Your Target Runtime
Next, decide how long you want backup power:
- 8–12 hours: short outages, urban areas
- 24 hours: 1 full day of emergency power
- 2–3 days: rural areas, unreliable grids
- Longer: you’re moving toward off‑grid battery backup
Take your daily kWh and multiply by your target days. That’s your kWh target for your diy backup battery system.
Portable vs Home Backup System
Pick the form factor before you pick parts:
-
Small portable diy backup battery
- Plug‑in devices only (extension cords)
- Great for WiFi, phones, laptops, a small fridge
- Easy to store, move to RV, camping, etc.
-
Fixed home battery backup system
- Tied to a subpanel or critical loads
- Runs fridge, lights, outlets, maybe a sump pump
- Can later grow into solar battery storage for home
If you’re thinking more long‑term or off‑grid, a fixed system makes more sense than a portable power station diy build.
Budget Ranges for DIY Backup Battery Builds
Very rough global pricing (USD range, DIY build):
- Basic 12V backup for WiFi + phones: $150–$400
- Small home backup (1–3 kWh, fridge + lights): $500–$1,500
- Larger home backup (5–10 kWh, multiple circuits): $1,500–$5,000+
- Whole house battery backup diy with solar: $5,000+ depending on size
For bigger or commercial‑scale storage, it often makes more sense to compare your DIY ideas with modular systems like a 5kW solar energy storage system for home or even containerized solutions once you’re above typical home sizes.
Plan for Future Solar and Expansion
Design your diy backup battery system so you don’t have to rip it apart later:
- Choose an inverter that can handle more battery capacity later
- Leave space in your battery enclosure for extra LiFePO4 batteries
- Use a solar charge controller that can accept more solar panel wattage
- Consider starting at 24V or 48V if you know you’ll scale to a bigger off‑grid battery backup
Think of this like building blocks. If you plan ahead, your first battery backup diy setup can grow into a full home battery backup system instead of becoming e‑waste.
Picking the Right Battery for Your DIY Backup Battery System
Choosing the right battery makes or breaks any diy backup battery or diy powerwall build. Here’s how I look at it when I’m planning a home battery backup system.
Lead‑acid & AGM: OK for beginners, but limited
If you’re just testing the waters with a small diy battery backup:
-
Lead‑acid (flooded)
- Cheap and easy to find
- Heavy, bulky, needs ventilation and regular maintenance
- You should only use ~50% of the rated capacity or you kill the battery early
-
AGM (sealed lead‑acid)
- Safer and maintenance‑free vs flooded
- Still heavy and doesn’t like deep discharge
- Shorter cycle life vs lithium, so long‑term cost is higher
They’re fine for a cheap diy backup power project or a simple backup battery for WiFi and router, but not ideal if you want serious, long‑term home battery backup.
Why LiFePO4 is best for DIY backup battery projects
For almost any serious diy backup battery system, I choose LiFePO4 (lithium iron phosphate):
- Long cycle life: 3,000–6,000 cycles vs a few hundred for lead‑acid
- Use more capacity: You can safely use ~80–90% of the rated Ah
- Safer chemistry: Much more stable, low fire risk when paired with a good BMS
- Lightweight & compact: Perfect for portable power station diy and indoor emergency power backup for home
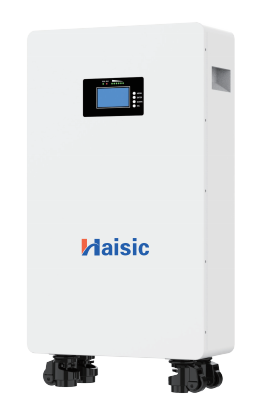
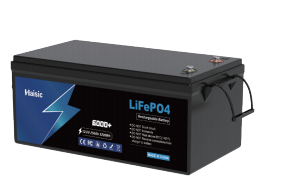
If you want a solid 12V building block, a 12V LiFePO4 deep cycle backup battery like the HAISIC 12V 70Ah LiFePO4 deep cycle lithium battery is a strong fit for backup power for refrigerator, sump pump, routers, lights, and small tools.
Cycle life, safety, and cost over time
When you look at cost per kWh over the life of the system:
- Lead‑acid is cheaper upfront but:
- Fewer cycles
- Lower usable capacity
- Needs earlier replacement
- LiFePO4 costs more upfront but:
- Lasts 5–10x longer
- Safer in stationary home energy storage diy setups
- Lower long‑term cost if you actually use the system
If you want a whole house battery backup diy or off-grid battery backup, LiFePO4 wins on total value almost every time.
System voltage: 12V vs 24V vs 48V
Pick voltage based on system size:
- 12V backup battery system
- Best for small loads: routers, LED lights, laptops, small fridge
- Great for diy solar generator and portable power
- 24V battery backup system
- More efficient for mid‑size setups (1–3 kW inverter)
- Good for small homes, RVs, cabins
- 48V home battery bank
- Best for larger inverters (3–10+ kW) and whole house battery backup
- Lower current = thinner cables, less heat, higher efficiency
- Ideal for pairing with a backup inverter for home and future solar
For larger LiFePO4 stacks, I like ready‑made higher‑voltage packs such as a 51.2V LiFePO4 100Ah battery for clean, scalable solar battery storage for home (for example, a modular pack like the 51.2V 100Ah LiFePO4 battery module).
Sizing battery capacity: Ah and kWh
To size your battery backup diy bank:
-
Calculate daily energy use (kWh)
- List each load (fridge, router, lights, sump pump, etc.)
- Watts × hours used per day = Wh
- Add them up and divide by 1,000 = kWh/day
-
Convert to battery size
- kWh needed ÷ system voltage = Ah needed
- Example: You want 2 kWh usable at 24V
- 2,000 Wh ÷ 24V ≈ 83 Ah
- Add a safety margin (20–30%) and discharge limits:
- Lead‑acid: size for only 50% usable
- LiFePO4: size for ~80–90% usable
-
Reality check by use case
- Backup battery for sump pump: short but high‑power bursts
- Backup power for refrigerator: lower power, but many hours per day
- Off‑grid solar battery bank: size for 1–3 days of autonomy
Once you know your voltage and Ah, you can decide whether you want a single big LiFePO4 pack or multiple units in series/parallel for flexible off-grid battery backup and future expansion.
Core Components for a DIY Backup Battery System
A solid diy backup battery setup lives or dies on the core components you choose. Here’s what actually matters and where you should put your money.
Battery Packs and Enclosures
Your battery bank is the heart of your diy backup battery system.
- Use LiFePO4 (lithium iron phosphate) or deep cycle AGM for stability and long life
- Keep batteries in a rigid, ventilated enclosure (metal cabinet or heavy plastic box)
- Add clear labels, strain relief, and cable management so nothing pulls loose or shorts
If you’re going for a mid‑size off‑grid battery backup, pair a LiFePO4 bank with a quality pure sine inverter/charger, like you’d see in a 5kW–6kW off‑grid solar inverter setup.
Inverter Choice (Pure Sine vs Modified Sine)
The inverter turns DC from your batteries into usable AC for your home.
- Pure sine wave inverter = best choice for home battery backup
- Safe for fridges, freezers, routers, laptops, chargers, TVs, pumps
- Runs quieter, cooler, and with fewer weird glitches
- Modified sine wave inverter = only for very budget builds
- Can overheat motors, cause noise in electronics, and shorten device life
For any serious battery backup diy system, I only recommend pure sine wave inverters.
Solar Charge Controller and AC Chargers
You need a clean, controlled way to charge your diy battery backup:
- Solar charge controller
- Use MPPT for higher efficiency, especially with larger solar arrays
- Sized for your panel voltage and total array current
- AC charger or inverter/charger combo
- Lets you charge from the grid or a generator
- Look for adjustable charge current and profiles for LiFePO4 or lead-acid
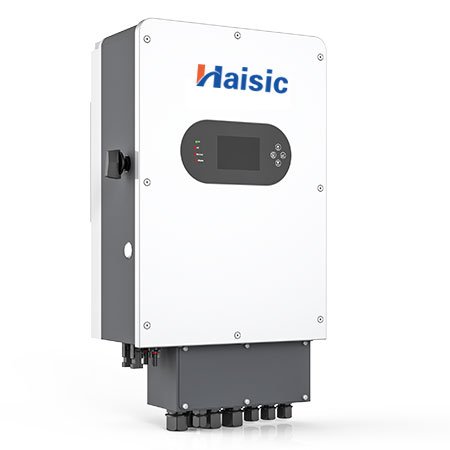
Hybrid units (inverter + MPPT + charger in one) like a 3kW–6kW hybrid solar inverter with MPPT are ideal if you plan to add solar to your home battery backup system later on: hybrid pure sine wave inverter with MPPT controller.
Battery Management System (BMS)
For lithium and LiFePO4 backup battery setups, the BMS is non‑negotiable.
A good battery management system for diy battery will:
- Protect against overcharge, over‑discharge, and over‑current
- Monitor cell voltage and temperature
- Balance cells for longer life and stable capacity
Never run a diy powerwall or LiFePO4 backup battery bank without a proper BMS.
Fuses, Breakers, Bus Bars, and Wiring
This is where most diy battery backup projects fail.
- Fuses and breakers sized for wire gauge and max system current
- Bus bars for clean, solid DC distribution instead of “wire spaghetti”
- Proper gauge wiring: thick enough for the current and distance
- Use crimped lugs, heat shrink, and secure mounting to prevent hot spots
If it can carry current, it needs correct sizing and proper protection. No shortcuts here.
Transfer Switch or Interlock
To safely tie a diy backup battery system into your home:
- Manual transfer switch – isolated subpanel for critical loads
- Interlock kit – allows safe backfeeding through main panel with mechanical lockout
- Prevents backfeeding the grid, which is dangerous and often illegal
If you’re not 100% sure about panel work, bring in a licensed electrician for this part.
Monitors, Meters, and Smart App Monitoring
Monitoring turns your diy backup battery from guesswork into a reliable tool.
- Battery monitor (shunt-based) for accurate state of charge (SOC)
- Voltage, current, and power meters on DC and AC sides
- Wi‑Fi / app monitoring to check status, history, and alerts remotely
A smart battery monitoring system makes it easy to see runtime, catch issues early, and optimize your diy backup battery system over time.
Designing Your DIY Backup Battery System
Design is where a diy backup battery goes from “idea” to something you can actually trust. Keep it simple, safe, and scalable.
Basic wiring for 12V, 24V, and 48V
- 12V backup battery system – Best for small diy battery backup builds (WiFi, lights, small fridge). Shorter cable runs, lower power.
- 24V battery backup system – Nice middle ground for off‑grid battery backup or medium home loads. Less current, smaller cables.
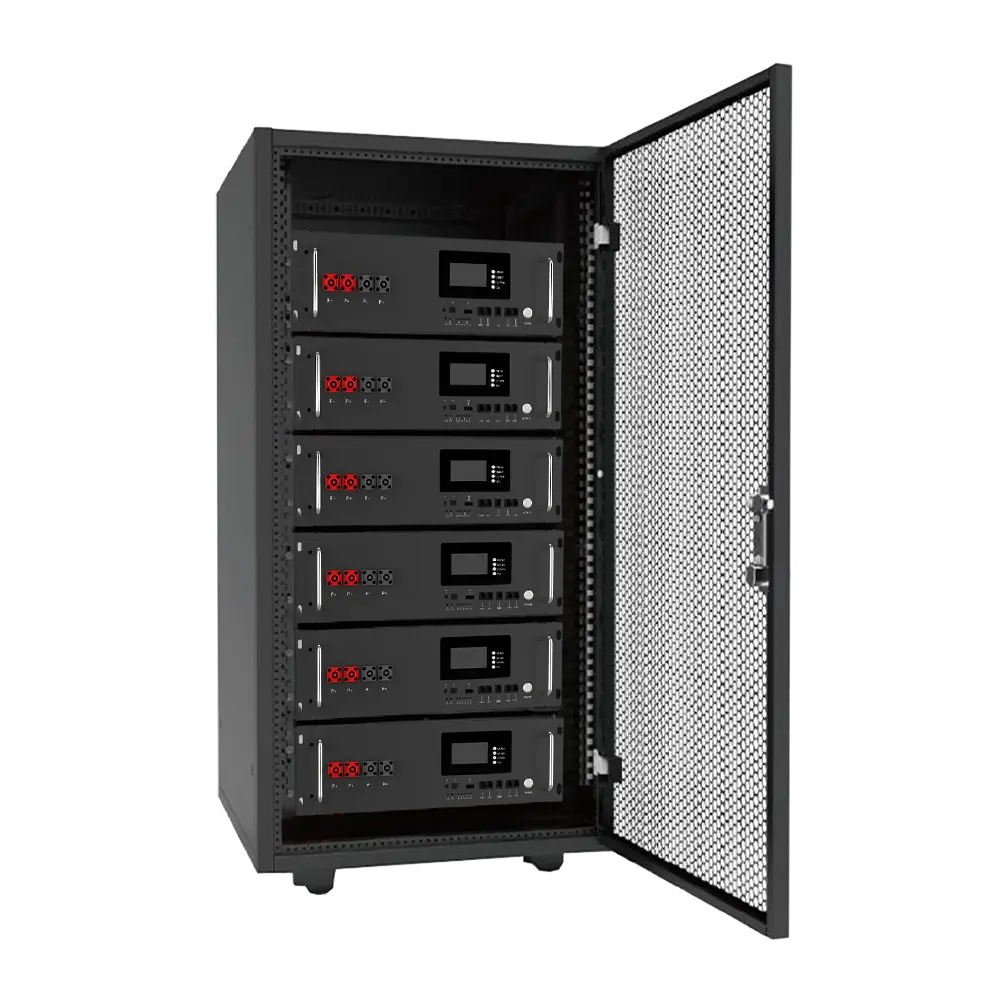
- 48V home battery bank – Ideal for whole‑home or larger diy powerwall setups. Higher efficiency, lower cable losses, works well with rack batteries like a 48V LiFePO4 rack battery pack.
Always match battery voltage to your inverter and solar charge controller specs.
Series vs parallel connections
- Series (↑ Voltage, same Ah)
- Used to build 24V or 48V from 12V batteries.
- Example: four 12V 100Ah in series = 48V 100Ah.
- Parallel (↑ Ah, same Voltage)
- Used when you want more runtime at the same system voltage.
- Example: four 12V 100Ah in parallel = 12V 400Ah.
- Keep it clean:
- Same brand, same chemistry, same age.
- Use proper bus bars, not “battery daisy chains”.
AC vs DC separation and grounding
- DC side: batteries, BMS, solar charge controller, DC fuses, DC disconnects.
- AC side: inverter output, subpanel, transfer switch, outlets.
- Rules of thumb:
- Don’t mix AC and DC in the same small junction box.
- Keep grounds bonded properly and follow local code.
- Neutral‑ground bonding should be done once, in the right place (panel or inverter, depending on design).
Choosing cable size, fuses, and disconnects
- Cables:
- Higher current = thicker cable.
- Keep runs short and use tinned copper where possible.
- Fusing:
- Fuse close to the positive battery terminal.
- Size fuse for cable rating, not just inverter size.
- Disconnects:
- Use proper DC disconnect switches on the battery side.
- Label everything: battery, inverter, charger, solar input.
Safe enclosures and ventilation
- Battery enclosure:
- Non‑flammable or fire‑resistant materials.
- No stacking cells loosely, use proper racks or boxes.
- Ventilation:
- Lead‑acid/AGM: must be vented to avoid gas build‑up.
- LiFePO4: lower gas risk but still needs airflow and space around packs.
- Location tips:
- Dry, cool, away from direct sun and flammable stuff.
- Leave easy access for checks and maintenance.
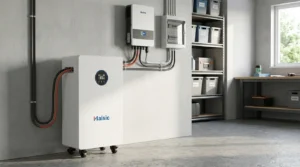
- For indoor home battery storage, look at solutions designed for safe, compact installs like a dedicated home lithium battery storage system.
Get the layout right once, and your battery backup diy setup will be safer, easier to expand, and a lot less stress during an outage.
Step‑by‑Step DIY Backup Battery Build
Prep: tools, safety gear, and workspace
Before you touch a wire, set up your diy backup battery workspace properly:
- Tools: multimeter, wire cutters/strippers, crimping tool, torque wrench, heat‑shrink, zip ties, screwdrivers, drill.
- Safety gear: insulated gloves, safety glasses, non‑metallic watch/bracelets off.
- Workspace: dry, clean, non‑flammable surface, good lighting, no kids/pets, no open flame.
- Keep a Class C or lithium‑rated fire extinguisher nearby.
Assembling and wiring the battery bank
Build your diy battery backup bank slowly and methodically:
- Lay out batteries in their final position (12V, 24V, or 48V configuration).
- Use short, thick cables (properly crimped lugs) for series/parallel links.
- Connect:
- Series: positive to negative to raise voltage.
- Parallel: positive to positive, negative to negative to add capacity.
- Install main fuse or breaker on the battery positive as close to the bank as possible.
- Double‑check every connection for tightness and polarity.
Installing and configuring the BMS
Your battery management system (BMS) is critical for a safe battery backup diy build, especially with LiFePO4:
- Connect BMS sense wires to each cell or battery group as per the wiring diagram.
- Route main positive/negative through the BMS where required.
- Program:
- Battery type (LiFePO4, AGM, etc.)
- Max charge voltage
- Low‑voltage cut‑off
- Max charge/discharge current
- If your BMS is integrated in a LiFePO4 pack, just verify settings with the app or display.
Hooking up the inverter to the battery bank
For a pure sine wave inverter for backup:
- Confirm inverter DC input voltage matches your bank (12V/24V/48V).
- Run short, thick cables from battery bank (via fuse/breaker) to inverter DC terminals.
- Connect negative first, then positive.
- Torque terminals to spec; loose lugs overheat.
- For larger home systems, consider a hybrid inverter like a 6kW IP65 hybrid solar inverter with pure sine output to combine backup and solar in one unit (hybrid solar inverter example).
Connecting the charger or solar charge controller
To keep your diy backup battery system charged:
- For AC charger / inverter‑charger:
- Connect DC side to battery via fuse.
- Plug AC side into grid or generator.
- Set correct battery type and charge current.
- For solar charge controller:
- Connect controller to battery first, then to solar panels.
- Keep panel voltage and wattage within the controller’s limits.
- Set battery chemistry and float/absorb voltages.
Testing voltage, polarity, and basic functions
Before you plug in any loads:
- Use a multimeter to confirm:
- Correct battery bank voltage
- Positive and negative polarity on every major connection
- Turn on BMS (if needed) and inverter with no load.
- Verify:
- Inverter powers on and shows nominal voltage.
- Charger/solar controller starts charging and shows correct battery type.
- Fix any alerts, error codes, or strange readings before moving on.
Connecting critical loads or a subpanel
Now you can use your emergency power backup for home safely:
- Simplest option: plug critical devices (fridge, Wi‑Fi, lights, laptop) into the inverter’s AC outlets or a dedicated power strip.
- Better option: run the inverter AC output to a critical loads subpanel through a manual transfer switch or interlock.
- Label circuits clearly (fridge, sump pump, router, lights).
- Test:
- Shut off grid power (via main breaker or transfer switch).
- Confirm your diy backup battery system keeps those circuits running smoothly.
Keep it tidy, labeled, and documented. That’s how you get a reliable diy backup battery system that just works when the power doesn’t.
Installing a DIY Backup Battery in Your Home
Choose a safe install location
Pick a spot that’s dry, cool, and easy to access. For most DIY backup battery systems, I recommend:
| Location | Good For | Avoid If… |
|---|---|---|
| Garage | Larger LiFePO4 backup battery banks, inverters | It gets very hot or floods |
| Basement | Quiet, stable temps, whole-house backup | Humidity or water leaks are common |
| Utility room | Small–mid home battery backup system | Space is tight or airflow is poor |
Keep in mind:
- Keep batteries off the floor (use a rack or shelf).
- Avoid bedrooms and living rooms.
- Keep clear access around the system for service and emergencies.
Ventilation, spacing, and fire safety
Even with safe LiFePO4 batteries, I never pack things too tight.
- Leave 10–20 cm of space around batteries, inverter, and charger.
- Avoid closed boxes with no airflow.
- Mount inverters and chargers on non‑flammable surfaces where possible.
- Keep a Class C or ABC fire extinguisher nearby.
- Never store fuel, solvents, or flammable junk right next to your diy backup battery system.
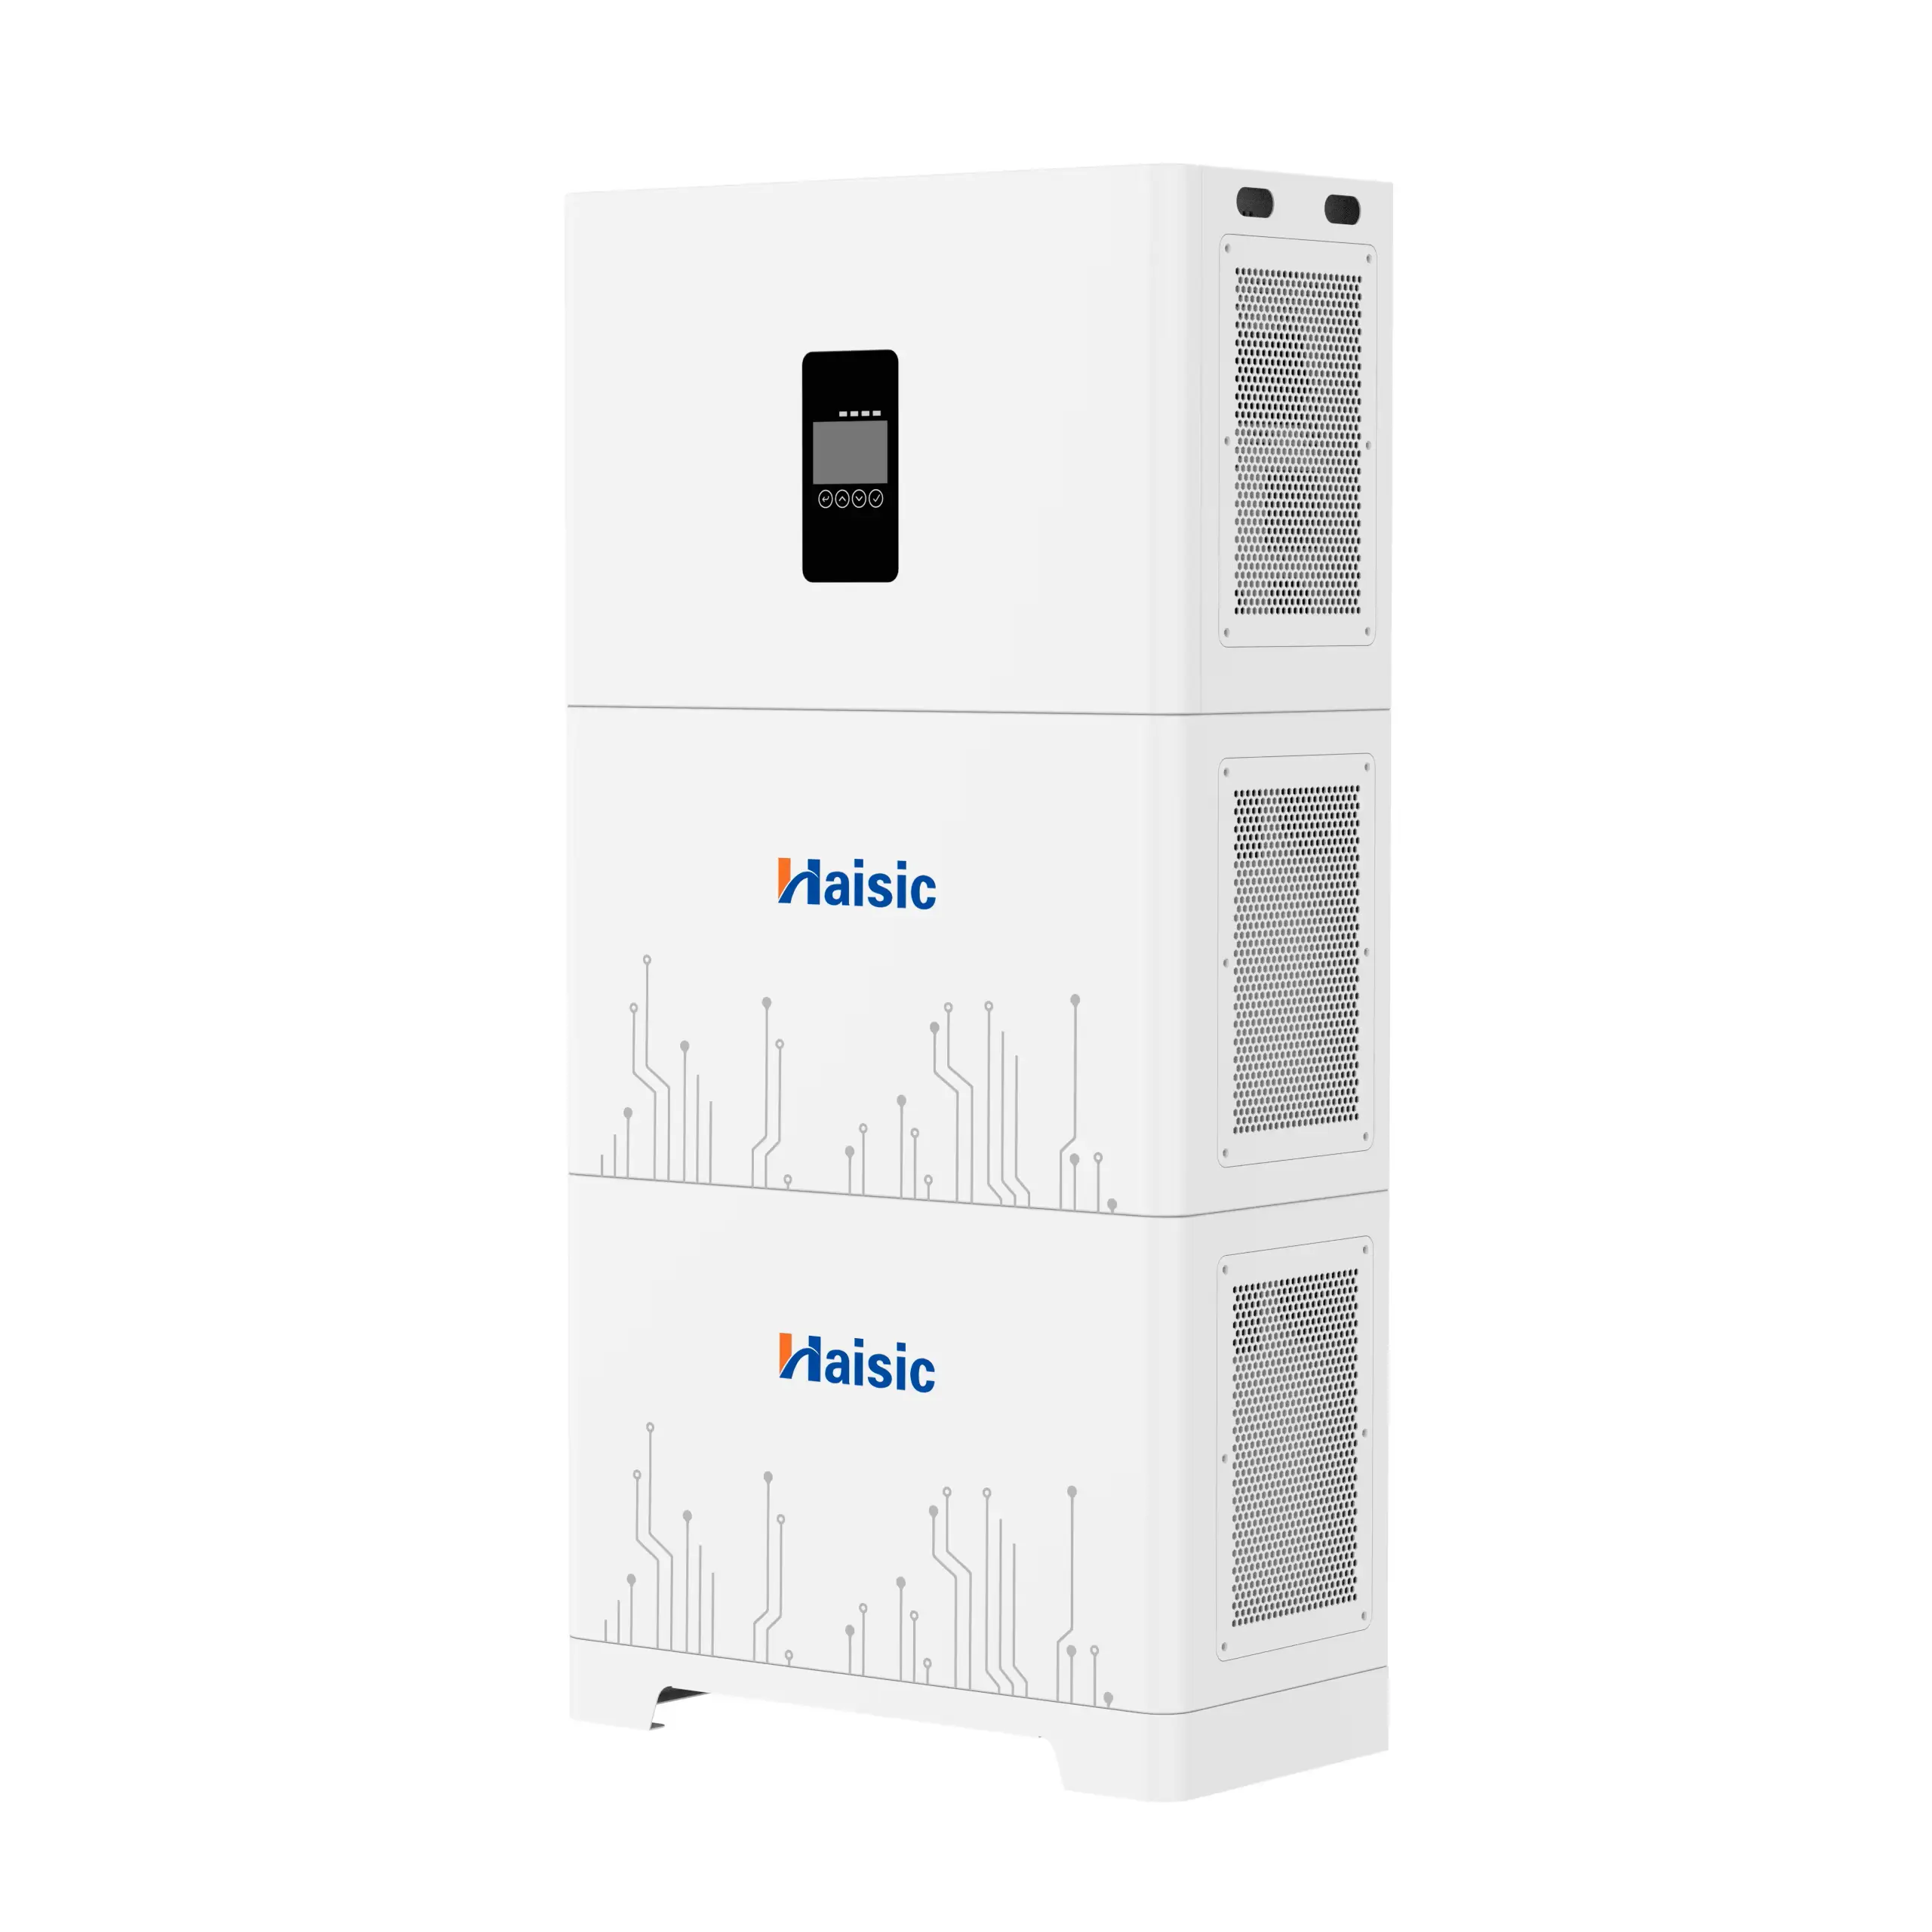
If you ever scale into a larger, fixed system like a 51.2V 100Ah floor‑mounted home energy storage unit (for example, setups similar in concept to floor‑mounted LiFePO4 home storage systems), spacing and ventilation become even more critical.
Plug‑in vs panel connection
You’ve got two practical ways to use your DIY battery backup:
1. Plug‑in method (simpler)
- Run extension cords from the inverter to:
- Fridge / freezer
- Router, modem, laptop
- Sump pump / essential tools
- Use heavy‑duty, grounded cords only.
- Don’t backfeed the house by plugging into a wall outlet. That’s unsafe and usually illegal.
2. Panel connection (cleaner, more “whole‑home” style)
- Connect inverter output to a subpanel that feeds only selected “backup” circuits.
- Needs proper breakers, wiring, and usually permits.
Manual transfer switch or interlock kit
If you want the backup inverter to feed house circuits, you must isolate from the grid.
-
Manual transfer switch
- Dedicated switch between grid and backup.
- Clear positions: “LINE” or “GEN / BATTERY.”
- Safest and easiest to explain to family.
-
Panel interlock kit
- Mechanical slide that prevents main breaker and backup breaker from being ON together.
- Budget‑friendly option for smaller diy battery backup setups.
Both methods keep your emergency power backup for home from energizing utility lines and protect linemen and your equipment.
When to hire a licensed electrician
You should bring in a pro if:
- You’re tying a backup inverter for home into your main panel or subpanel.
- You’re installing a transfer switch for generator and battery.
- Your local code requires permits for any new circuits or power sources.
- You aren’t 100% sure about breaker sizing, wire gauge, or grounding.
I run a lean operation, but this is one area where saving a few dollars can cost you your house or your insurance coverage.
Initial charge, test run, and load testing
Before relying on your diy backup battery, do a full shake‑down:
-
Initial charge
- Fully charge the battery using the recommended charger profile (especially important for LiFePO4).
- Confirm voltage and state of charge with your monitor or meter.
-
No‑load test
- Power on inverter and BMS.
- Check for error codes, odd noises, or hot spots.
-
Light‑load test
- Plug in a small load (phone charger, lamp).
- Confirm stable output voltage and frequency.
-
Real‑world load test
- Connect what you actually plan to run: fridge, WiFi, lights, maybe a sump pump.
- Run for 1–3 hours and:
- Watch battery voltage / %.
- Check inverter temperature.
- Confirm cables and connections stay cool.
-
Review runtime
- Note how long your diy battery backup ran at that load.
- Use this to fine‑tune your kWh sizing for backup battery in the future.
Once this passes, your diy battery backup is ready for real outages—not just theory.
Safety rules for any DIY backup battery system
If you’re building a DIY backup battery or diy powerwall, you can’t cut corners on safety. Here’s the minimum I’d stick to every single time.
Personal safety and PPE
When working on any diy battery backup system:
- Use insulated tools (no bare metal screwdrivers on live terminals).
- Wear safety glasses, insulated gloves, and non‑flammable clothing.
- Remove metal jewelry (rings, watches, chains) before touching the battery bank.
- Only work on your diy backup battery system when it’s de‑energized whenever possible.
Electrical safety and short‑circuit protection
High current is the real danger in a home battery backup system:
- Always install proper fuses or DC breakers as close to the battery positive as possible.
- Use cables sized for the inverter’s max current and the length of the run. Thin cables overheat.
- Keep tools and loose hardware away from battery terminals to avoid short circuits.
- Clearly label positive and negative and double‑check polarity before connecting.
Fire safety with lithium and LiFePO4
LiFePO4 is one of the safest chemistries for a LiFePO4 backup battery, but it’s still high energy:
- Use certified cells/packs and a quality battery management system (BMS).
- Mount batteries in a non‑flammable enclosure, away from flammable materials.
- Keep a Class ABC or lithium‑rated fire extinguisher nearby.
- Don’t exceed the manufacturer’s charge, discharge, or temperature limits. For larger high‑voltage setups, look at industrial‑grade packs like a 512V 100Ah high‑voltage LiFePO4 battery that already integrate advanced safety.
Avoiding overcharge, over‑discharge, and thermal issues
For any off-grid battery backup or solar battery storage for home:
- Use a BMS that protects against over‑voltage, under‑voltage, over‑current, and over‑temperature.
- Pair your battery with a compatible inverter/charger or solar charge controller with correct settings for your chemistry.
- Never bypass low‑voltage or high‑voltage cutoffs “just to keep it running”. That’s how packs die or fail.
Codes, permits, and when to call a pro
A battery backup diy project still has to respect local rules:
- Follow local electrical codes for wiring, grounding, and overcurrent protection.
- Get permits where required, especially if tying into your home electrical panel with a transfer switch.
- Hire a licensed electrician for panel work, interlocks, and grid‑tied connections. You can build the battery bank, but let a pro handle the final tie‑in to your house.
Common DIY Backup Battery Mistakes
Even a solid diy backup battery build can fail fast if you overlook the basics. Here are the biggest mistakes I see and how to avoid them.
1. Undersizing the battery bank and inverter
Most people underestimate what they’ll actually run during an outage. Result: the diy battery backup dies in a few hours, or the inverter trips as soon as you start a fridge or sump pump.
- Size for surge watts, not just running watts (fridges, well pumps, AC units spike hard on startup).
- Aim for at least 1–2 days of backup for critical loads if you can afford it.
- For serious home battery backup, look at higher‑capacity LiFePO4 stacks like a 48V 100Ah home energy storage battery (e.g., a 51.2V stackable LiFePO4 unit for backup systems) instead of tiny 12V setups.
2. Mixing old and new batteries or chemistries
Mixing a new lithium iron phosphate battery with old lead‑acid, or even old and new LiFePO4 packs, is asking for imbalance and early failure.
- Never mix different battery chemistries (LiFePO4, AGM, GEL, flooded).
- Don’t parallel batteries with very different ages or capacities.
- Build your off-grid battery backup as a matched set from day one.
3. Using thin cables or poor connectors
A diy backup battery system pushing thousands of watts through cheap jumper cables or undersized wire is a fire risk.
- Use properly sized copper cables rated for your max current.
- Crimp lugs correctly and tighten all connections.
- If a cable or connector feels warm under load, it’s undersized or loose.
4. Skipping the BMS or buying a junk one
For any lithium or LiFePO4 backup battery diy project, a good battery management system (BMS) is non‑negotiable.
- BMS protects against overcharge, over‑discharge, overcurrent, and short circuits.
- Cheap no‑name BMS units can fail and take your entire diy powerwall with them.
- For larger 24V or 48V home battery banks, use a reputable BMS sized for real‑world current, not just the marketing number.
5. Ignoring ventilation and temperature limits
Even safe chemistries like LiFePO4 need proper placement. Lead‑acid needs it even more.
- Don’t cram your battery bank into a sealed closet or tiny box.
- Keep batteries away from direct sun, heaters, or freezing temps.
- Follow the recommended charging temperature range for your battery type.
6. Not labeling or documenting your system
A clean diy backup battery system should be easy to understand at a glance—for you and any electrician who touches it.
- Label main disconnects, fuses, inverter, AC input, and critical load circuits.
- Keep a simple wiring diagram and spec sheet (battery size, inverter, BMS settings).
- Clear labels help in emergencies, repairs, and future upgrades to your home battery backup system.
Maintenance and Troubleshooting Your DIY Backup Battery
Keeping a diy backup battery running safely and reliably comes down to a few simple routines. If you stay on top of checks and basic troubleshooting, your diy battery backup will last years and stay ready for outages.
Simple Monthly and Yearly Checks
Do a quick monthly check:
- Visual inspection: look for bulging cells, corrosion, loose bolts, burned connectors, or damaged cables.
- Clean terminals: wipe dust and tighten all lugs and bus bar connections.
- Check inverter & charger: confirm they power on, fans run, and no warning lights show.
- SOC check: make sure the battery isn’t sitting at 0% or full all the time.
Once or twice a year:
- Test your backup inverter for home under real load (fridge, router, lights).
- Verify all fuses, breakers, and transfer switch functions.
- Confirm the BMS settings still match your battery (cut‑off voltages, charge limits), especially for LiFePO4 backup batteries.
Monitor Battery Health and State of Charge
For any diy backup battery system, monitoring is non‑negotiable:
- Use a battery monitor / shunt or smart BMS with an app.
- Track:
- State of charge (SOC)
- Charge/discharge current
- Cell voltages (for lithium iron phosphate battery packs)
- Temperature
A pre-built LiFePO4 pack with built‑in BMS and app, like a compact 12.8V LiFePO4 battery pack with 5 kWh capacity, makes SOC and health tracking much easier than trying to guess from voltage alone.
Balancing Cells in Lithium and LiFePO4 Packs
If you’re running a diy powerwall or larger LiFePO4 backup battery bank:
- Watch for cell voltage differences over ~0.05V at full charge.
- Use:
- The BMS’s built‑in balancing function, or
- An external active balancer for bigger off‑grid battery backup banks.
- Occasionally do a controlled full charge (following manufacturer limits) so the BMS can balance properly.
Never force-balance cells beyond the rated voltage—this is how lithium battery projects get dangerous fast.
Fixing Common DIY Backup Battery Issues
Most battery backup diy problems fall into a few buckets:
1. Low voltage / system won’t start
- Check pack voltage with a multimeter.
- If below BMS cut‑off, use a proper lithium charger to bring voltage back into range.
- Confirm the BMS hasn’t tripped for low voltage, overcurrent, or high temp.
2. Inverter trips or has no output
- Battery voltage too low under load → battery bank is undersized or nearly empty.
- Loose or undersized cables → voltage sag and inverter shutdown.
- Overload: reduce loads or upgrade to a bigger pure sine wave inverter for backup.
3. No output to loads / house
- Check breakers, fuses, transfer switch, and any DC disconnects.
- Verify polarity and all ground connections.
- Confirm the inverter is in the correct output mode (backup vs charger only).
When to Replace Batteries, Fuses, or Cables
Don’t try to “stretch” worn parts in a home battery backup system:
- Replace batteries when:
- Capacity drops noticeably (e.g., your “5 kWh” bank only gives ~2–3 kWh).
- You see swelling, leaking, or repeated BMS faults.
- Replace fuses or breakers after any significant fault event or visible heat damage.
- Replace cables if:
- Insulation is cracked or melted.
- Lugs are burnt or won’t stay tight.
- They run hot under normal load (usually a sign they’re too thin).
If you want less hands-on maintenance, using a quality pre‑assembled LiFePO4 home battery pack (for example, a higher‑voltage 12.8V or 25.6V unit with integrated BMS and protections) is usually cheaper and safer over its lifetime than constantly nursing old lead‑acid batteries in your diy backup battery system.
Upgrading and Expanding Your DIY Backup Battery
Once your diy backup battery is running smoothly, scaling it up is the smart next move. I always treat upgrades like a mini‑redesign, not just bolt‑ons.
Adding More Battery Capacity Safely
When you expand a diy backup battery system, safety comes first:
- Match everything: same chemistry (ideally LiFePO4), voltage, and similar age. Don’t mix old and new or different brands randomly.
- Expand in modules: add complete battery modules in parallel rather than “one cell here, one there.”
- Size protection correctly: update fuses, breakers, and bus bars for the higher current.
- Use proper enclosures: if you’re stepping up to a larger home battery backup system, use a dedicated battery cabinet or wall‑mount module.
If you’re ready to jump from a hobby setup to a more serious home energy storage diy build, modular packs like a 25.6V 200Ah LiFePO4 home battery work well as stackable building blocks.
Upgrading to a Bigger Inverter or Higher Voltage
A diy battery backup often outgrows the first inverter:
- Bigger inverter: move to a pure sine wave inverter sized for surge loads (fridge, AC, well pump).
- Higher voltage: 24V or 48V cuts current, reduces cable size, and runs cooler—ideal for off‑grid battery backup and whole house battery backup diy.
- Plan the jump: switching from 12V to 24V/48V usually means rewiring the battery bank in series and confirming your charge controllers and BMS can handle the new voltage.
Integrating Solar Panels and Battery Storage
Tying in solar makes your diy backup battery system far more useful:
- Add a MPPT solar charge controller sized for your array and battery voltage.
- Use solar as your main charger and grid or generator as backup.
- Aim for at least enough solar to refill a normal day’s use plus some margin, especially if you want true off‑grid battery backup.
Modular solar‑ready packs like a 15kWh 51.2V LiFePO4 solar battery are ideal when you’re pushing toward serious solar battery storage for home.
Building Toward Whole House Battery Backup
You don’t have to jump straight to full home battery backup:
- Start by backing up critical loads only: fridge, lights, Wi‑Fi, router, sump pump, key outlets.
- Use a subpanel + transfer switch or interlock to keep things legal and safe.
- As you add capacity and inverter power, move more circuits to the backup panel until you reach practical whole house coverage.
Smart Monitoring, Wi‑Fi Apps, and Automation
Smart control turns a basic battery backup diy into a real home energy system:
- Use a battery monitoring system or smart BMS with Bluetooth/Wi‑Fi.
- Track state of charge (SOC), voltage, and power use via app or web dashboard.
- Automate:
- Switch to battery during peak utility rates.
- Auto‑start generator if SOC gets too low (for hybrid setups).
- Get alerts for low voltage, high temperature, or faults.
As you scale, the goal is simple: a diy backup battery system that’s bigger, smarter, and still safe and easy to live with.
DIY Backup Battery Costs and Savings
Typical diy backup battery cost ranges
Here’s what most people spend on a diy backup battery or diy powerwall setup:
-
Portable diy backup battery (router, phones, small loads)
- 12V LiFePO4 battery, small inverter, basic charger
- Rough range: $200–$600
-
Small home diy battery backup (fridge, lights, Wi‑Fi, sump pump)
- 1–5 kWh LiFePO4 bank, 1–3 kW pure sine inverter, decent BMS
- Rough range: $800–$3,000
-
Whole house battery backup diy (core circuits, multiple days)
- 10–30+ kWh LiFePO4, 5–10 kW inverter/charger, full protection gear
- Rough range: $4,000–$15,000+ depending on quality and how much you do yourself
If you don’t want to build from cells, using a modular home energy storage pack like a 32 kWh all‑in‑one LiFePO4 system can cut install time while still staying more flexible than most brand-name systems.